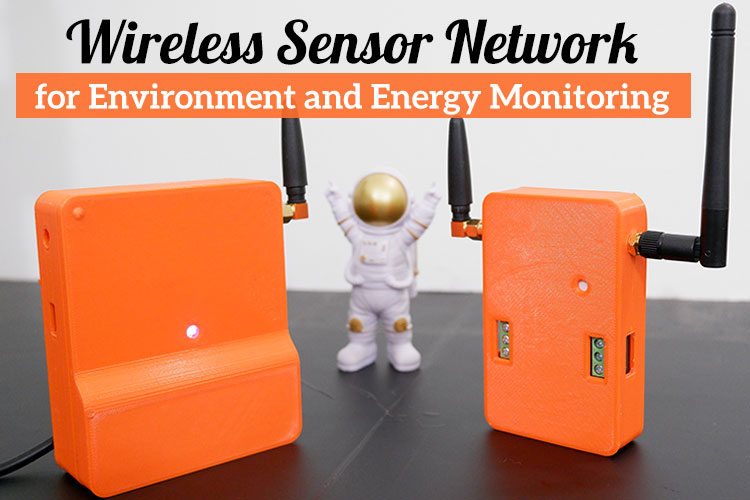
For this particular contest, I wanted to build something that revolves around the theme, and at the same time, I wanted to build something that’s of my interest, i.e., wireless devices. So, I’m connecting the interest with the theme to create a wireless sensor network for environmental and energy monitoring.
My goal is to mainly deploy this in a large-scale agricultural field or greenhouse, where I can effectively monitor different parameters such as crop health, temperature, humidity, soil health, and energy consumption of equipment used in this area.
By collecting this data, we can optimally use the resources, which in turn saves energy. While the concept might sound simple, the complexity of the project really lies in choosing the right components to keep the cost low and make this project scaleable.
Brainstorming
I spent a few hours coming up with a list of features that I could implement in a wireless sensor network.
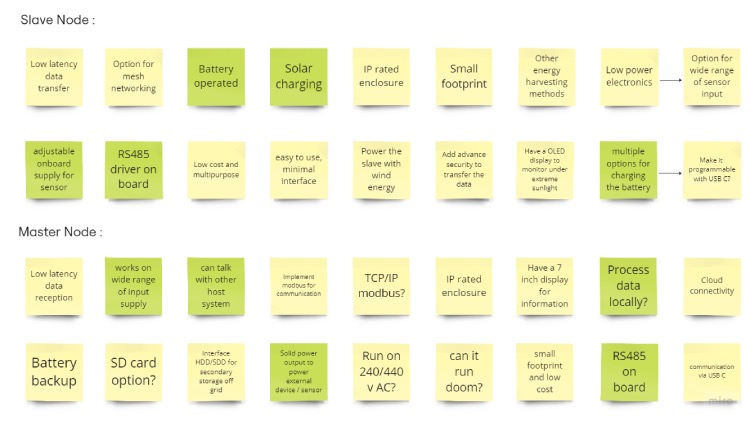
Even though most of these ideas are possible, it’s really hard to implement all of them at once because of time and cost constraints. So, I have shortlisted some of them that will go into the final project. I have discussed more detailed about my design process in this video.
Shortlisting Features
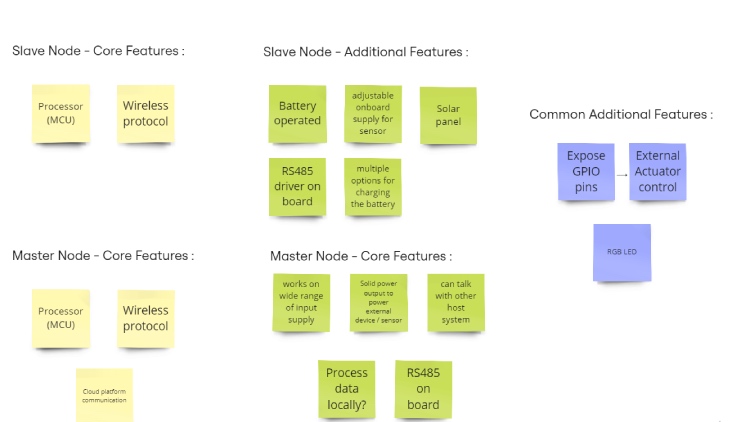
Core feature for the slave node:
- A processor to read the sensor data
- A Wireless protocol to send the data wirelessly
Core feature for the Master node:
- Same Wireless protocol that’s implemented on the slave to read the data
- An interface to process the sensor data and send it to a cloud platform
I have also shortlisted more features that go into the WSN, considering the cost and the time required to implement them.
Additional slave features:
- Battery to power the slave.
- Have an inbuilt RS485, as many industrial and agriculture sensors use them by default.
- Since I’m planning to use the system both indoors and outdoors, I will add many ways to power the slave and also charge the battery, either by DC jack, USB C, or by using a terminal block.
- Then, finally, having an adjustable boost converter to convert the battery voltage to the required voltage for various sensors.
Additional Master Features:
- Make sure it can handle a wide range of inputs because most industrial devices and even outdoor devices run on 12v - 24v.
- A robust power protection system to avoid fluctuation, overcurrent, transient voltage, and reverse current protection.
- Have an option for local processing, possibly with a Raspberry Pi Zero. So, let's include a 2A buck converter for power.
- I will include a RS485 drive to communicate with other host devices on site, like PLC or other industrial host system.
Now, for both slave and master, I want to expose some of the GPIO pins for external circuits like controlling servos or stepper motors. Which can be used to control irrigation system, solar panel direction, etc. Finally, let’s include an RGB LED as an indicator instead of having some small fancy display.
Common Component Selection
Wireless protocol and wireless component selection:
From the final feature list, we can see there are quite a few things that’s common to the slave and master. So, let’s start with finding the components for those features.
Starting with the wireless communication protocol, as I would like to implement this system both outdoors and indoors, LORA would be the best choice. It consumes less power and can transfer data over kilometers, which is perfect for our battery-based slave module.
Here, the LORA is just a wireless protocol, and there are many manufacturers who make this LORA-based IC and the modules. So, we need to shortlist the selection of the LoRa module or IC that is going to go into our circuit.
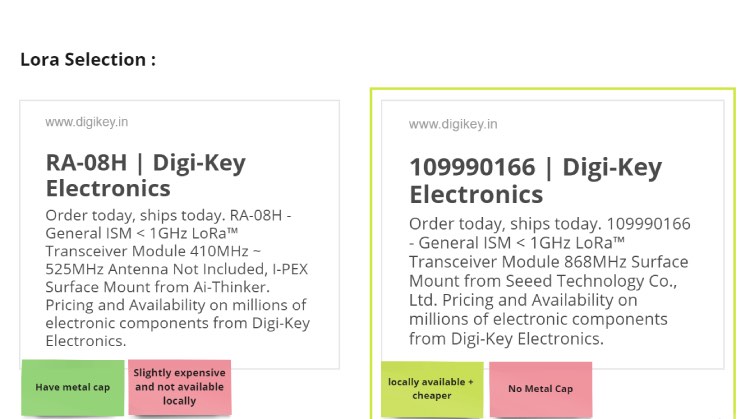
First, I need to find a LORA module that’s legal to use in India. In this case, I need to search for the radio frequency around 868 MHz. Then I need to find a module that I can easily source and that's also cost-effective at the same time. So, finally, after some research, I settled on the RFM96 LORA module, which satisfied all the requirements.
Microcontroller Selection :
Once the LORA is selected, I need to find a suitable microcontroller to fetch the data from the sensor and send it through the LORA.
In this case, I chose the esp32C3 mini and esp32H2.
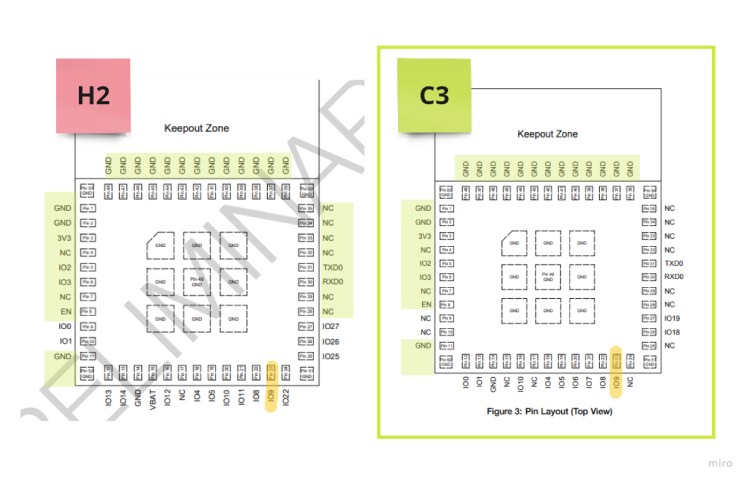
I know there are other more energy-efficient and cheaper microcontrollers. But these ICs were chosen for two reasons. First, they are drop-in replacements for each other, which means you can replace one with the other and they would still work. So, in the long run, this can help me if I end up having some supply chain issues. Secondly, the C3 mini comes with built-in Wi-Fi and Bluetooth support, which can be utilized when deciding to use the slave module as an independent device, where it can still send the data directly to the cloud using the WiFi.
As for the H2 mini, it supports additional protocols like Matter, Zigbee, and Thread. This means the same slave node can support multiple protocols at the same time, allowing it to integrate with other smart devices that are installed in the existing system.
For instance, if you have UV smart lights or other industrial equipments that support protocols like zigbee, thread, or matter installed in your greenhouse, you can control them by receiving commands from the master node via LORA, interpreting them in slave, and control the lights with zigbee or thread.
RS485 Selection:
Next, for the RS485 protocol, I wanted to use something that’s very robust and easy to procure.
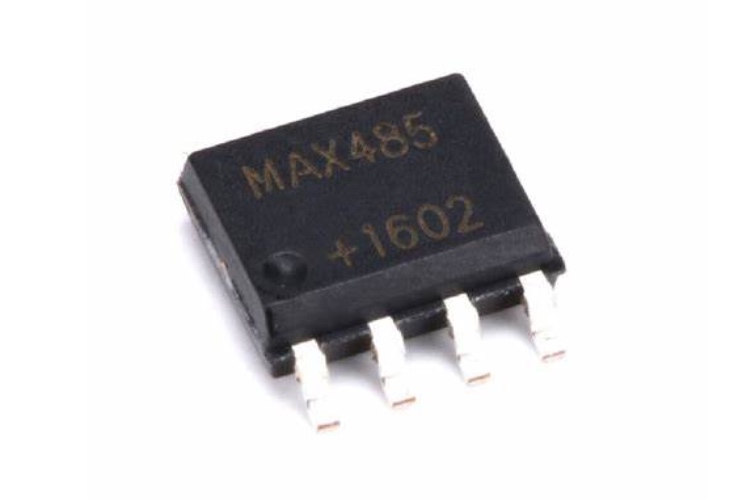
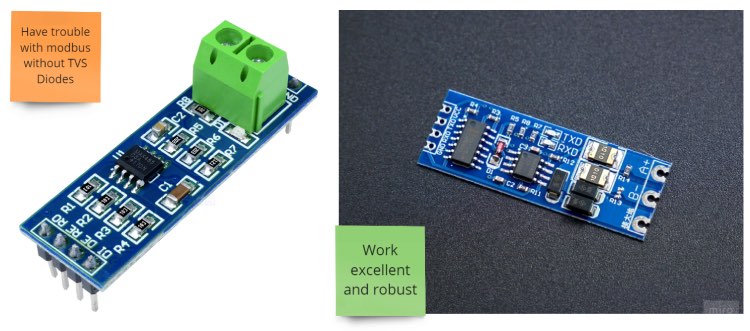
The MAX485 IC is a very popular IC which is used in a lot of industrial devices, so I dug little more research on this particular IC and performed some test on various modules based on it. Which really helped me decide the best circuit to build around MAX485.
Then there are a few common components I choose, like the 0805 capacitor, 0805 resistors, and AMS1117/MCP linear regulator to keep the system stable, and a WS2812B RGB led for indication. With these, we have selected the components that can be used for both the master and the slave nodes.
Now, we need to find remaining components for the salve and master.
Slave Component Selection
Battery :
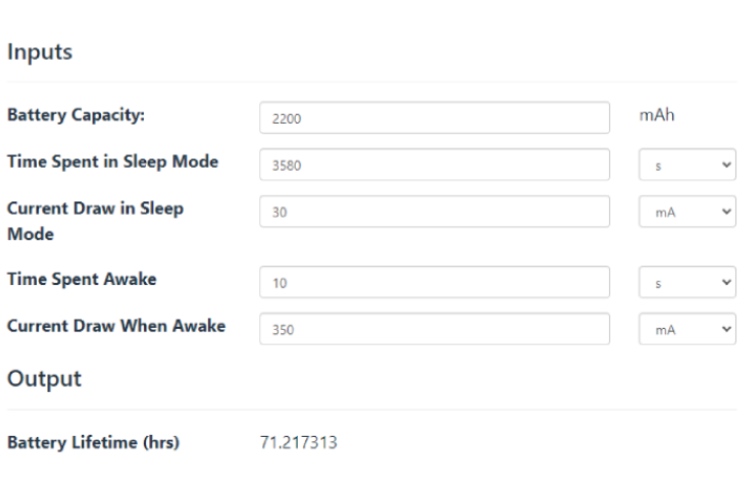
For the battery, I did a very rough calculation on how much power the system might consume during sleep and while transmitting. With the current component selection and a 2200 mAh battery, the slave should at least last between 3 and 4 days!
Battery Management Circuit:
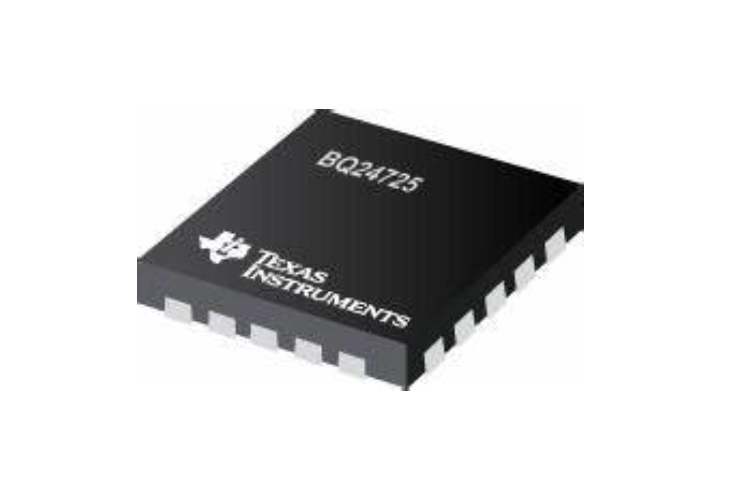
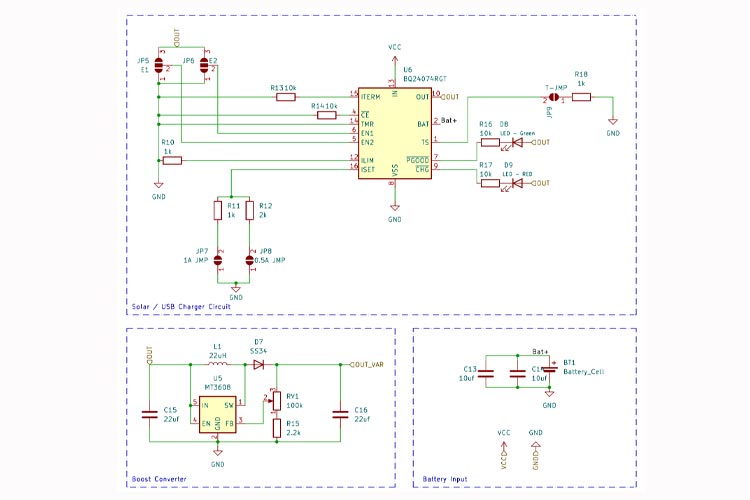
However, changing the battery very often isn’t very practical. That’s the reason we have solar panels on our feature list. Usually, it's a little complicated to have both a solar-based charger and an external charger together. But I came across an Adafruit circuit based on the BQ24074 IC that is simple and easy to use. This IC allows the maximum power from the solar panel to the battery without using maximum power point tracking. At the same time, it gives a wide range of input options to charge the battery and use the circuit with external power simultaneously.
You can read more about circuit directly from adafruit here.
SMP Circuit:
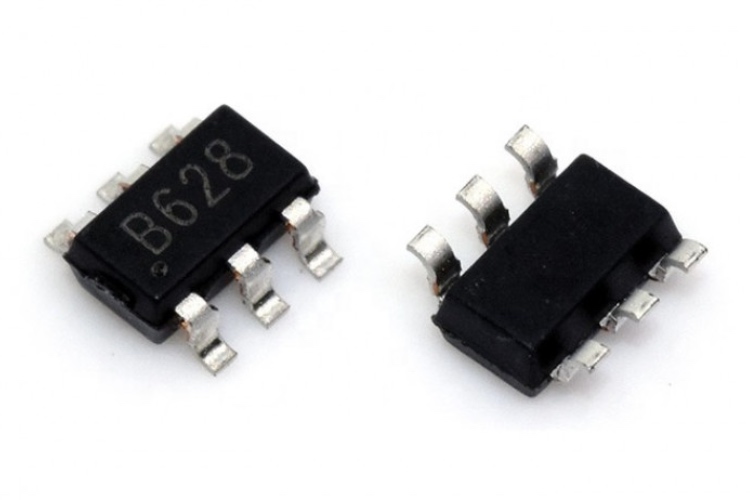
Finally, to finish the component selection for the slave, I will use the MT3609 SMP circuit to generate a variable power supply for various sensors. As most industrial sensors can easily vary from 5v-24v
Master Component Selection:
5 Volt 2 A supply :
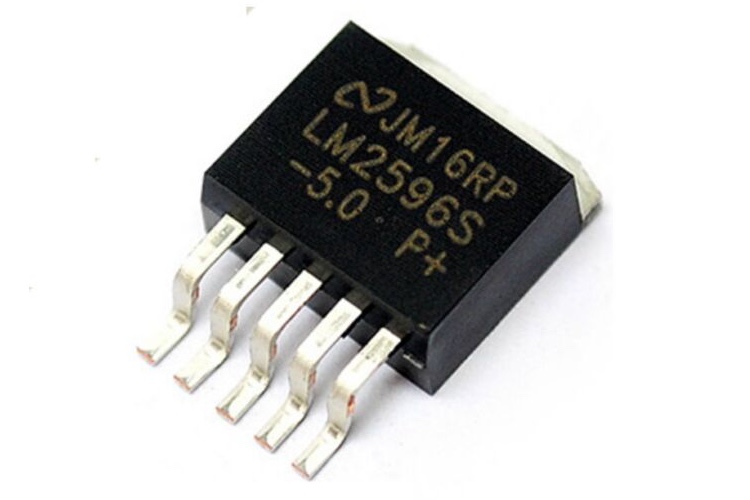
To run the Raspberry Pi, the other component that we need to find is a way to take in wide range of input from 12 to 24 volts and produce a 5 volt, 2 A, to power external devices. And for this, I chose LM2596s-5, just because I have used them in the past, low-cost and very easy to procure. Along with this, I also chose appropriate DC-jack, terminal block to handle this current rating.
Putting Everything Together!
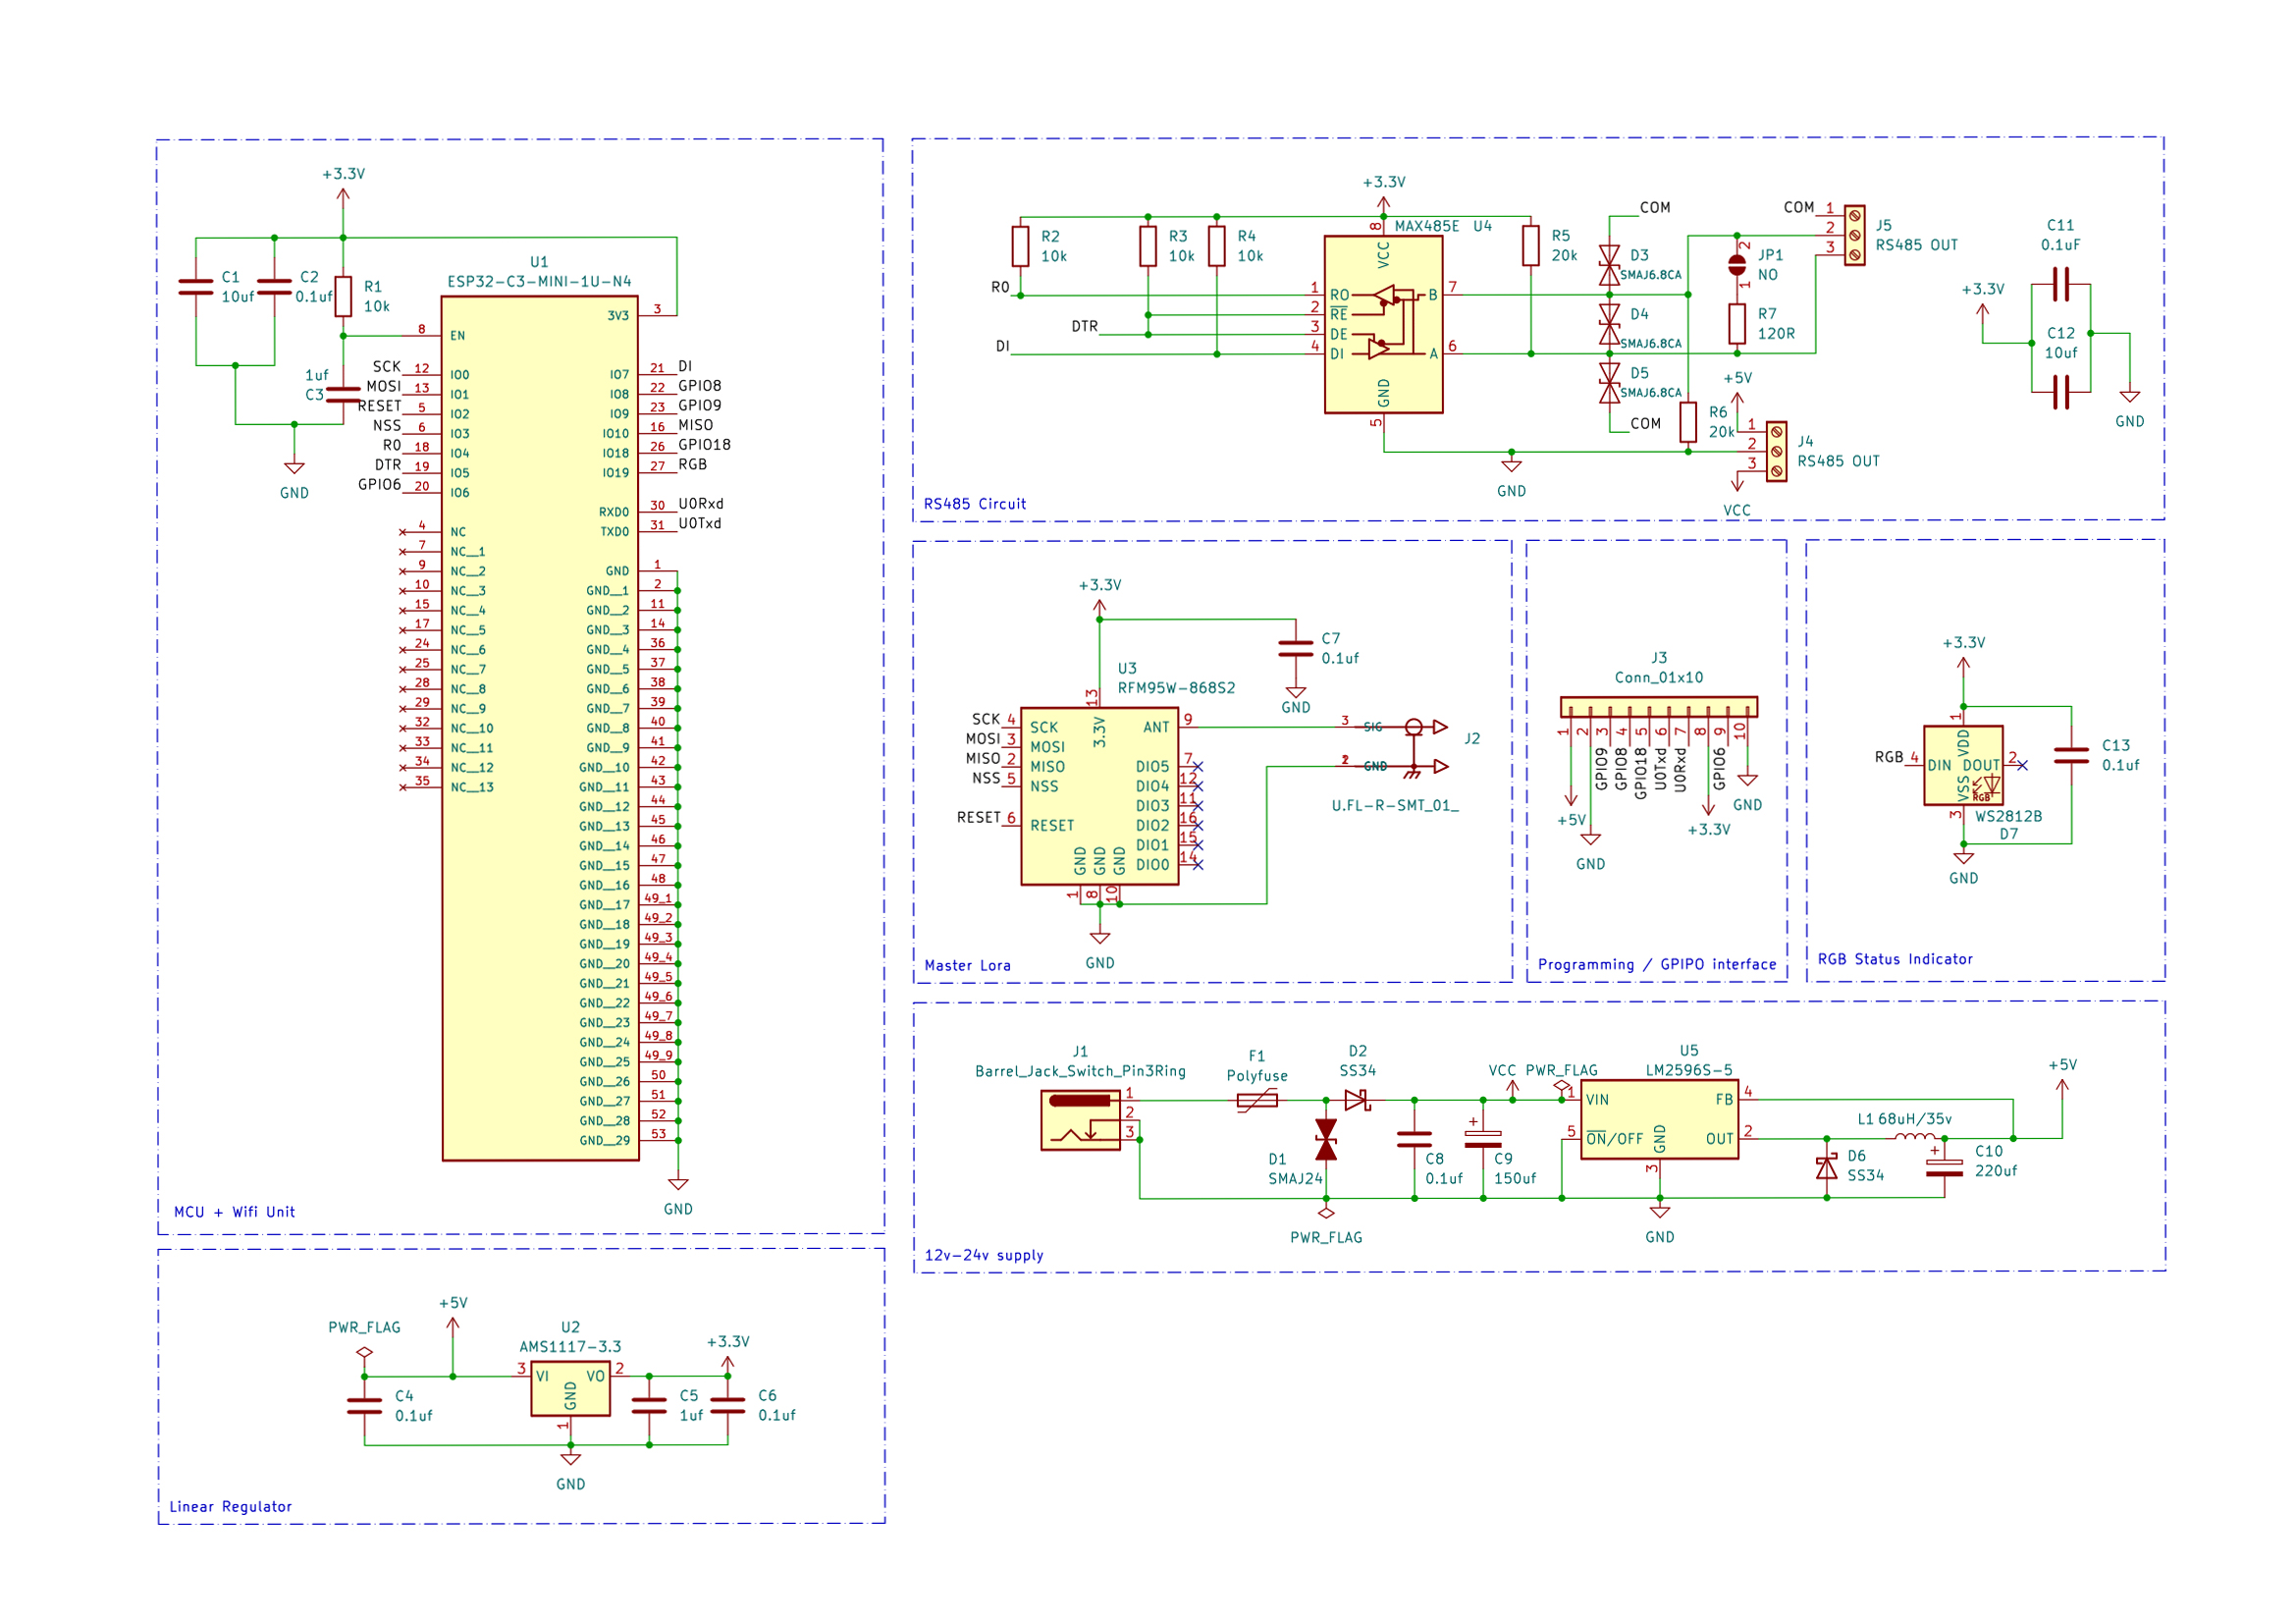
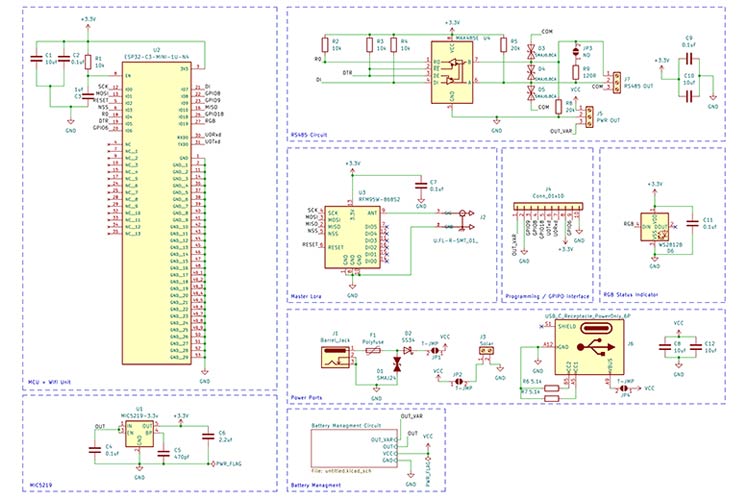
Once I had all the components in place, I had to just do proper research on each of the components and get there datasheet. After the research, I put a circuit together for both the master and the slave nodes.
Master Node Circuit :
Slave Node Circuit - 1:
Slave Node Circuit - 2 (Battery/Power management ):
Based on the above circuit for slave and master, these are the BOM files that've been generated, you can find them on the linked github page.
PCB Design for Master Node:
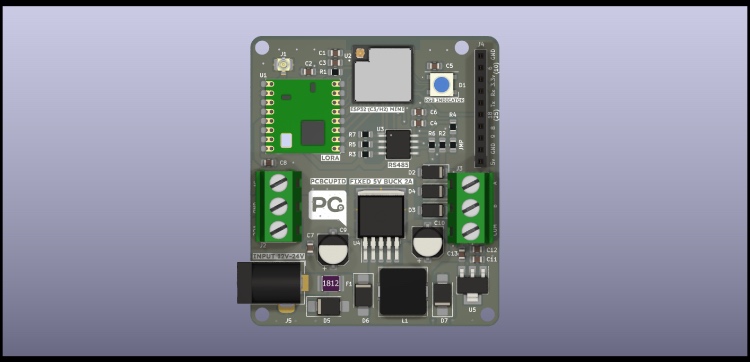
I designed this project completely on Kicad, During the design process, I made sure to follow all the basics of PCB design rules while making separate sections for power, RF circuit, and RS485 input.
You can read more about the rules I followed : here
This is the front copper layer of the master PCB :
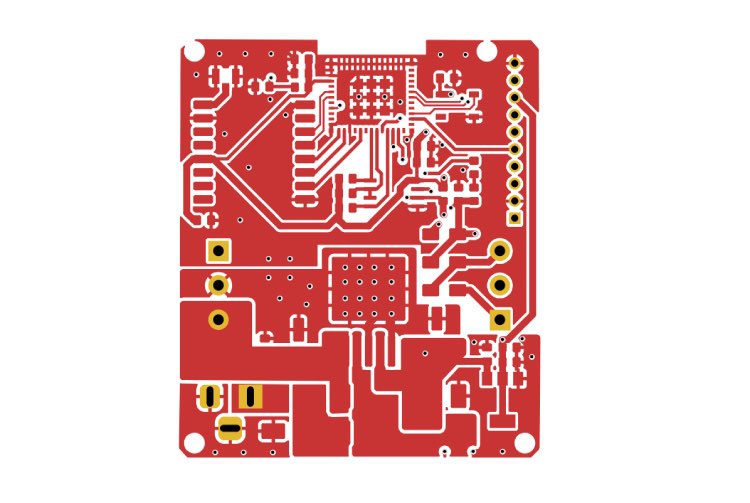
This is the bottom copper layer of the master PCB:
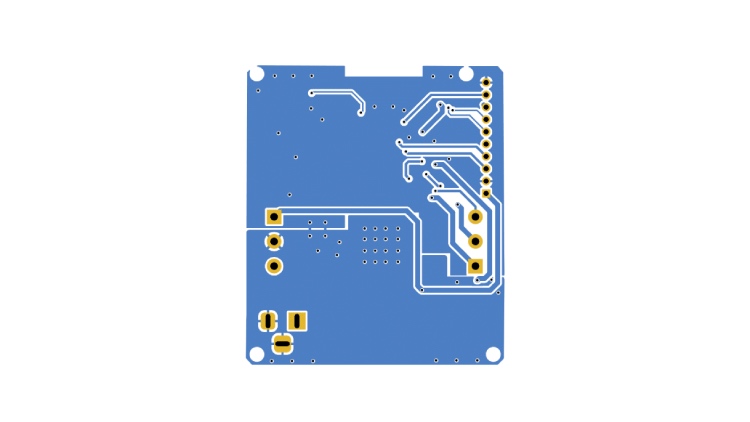
PCB Design for Slave Node:
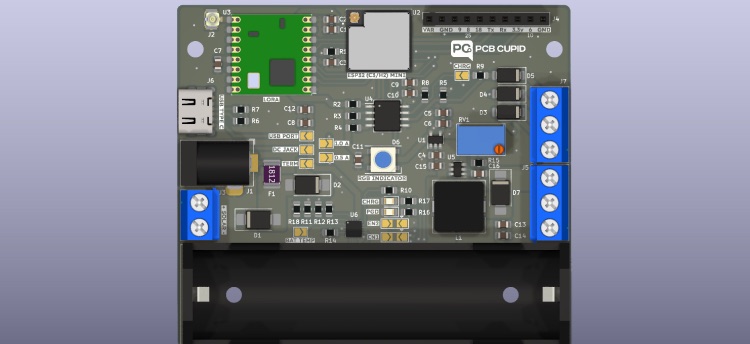
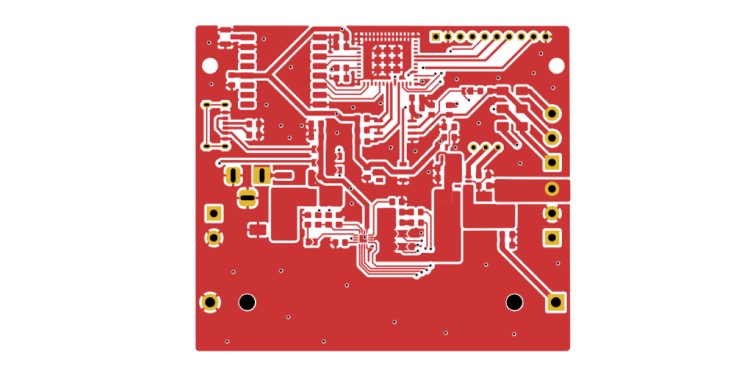
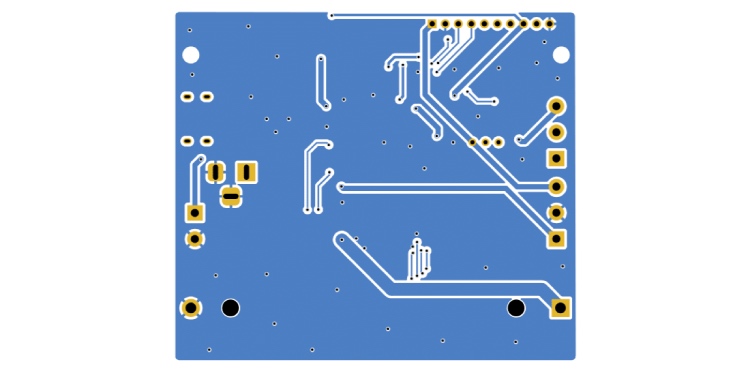
I followed the same process for slave node and designed the board completely in KICAD. Here I had to pay little extra caution on the BQ24074 IC. It has tons of features, and I had to place various jumpers to change the functionality depending on the requirements of the slave module.
Because of the battery, I had to make the PCB little larger than the slave, but it gave me a lot of room for routing and separating different sections of the circuit very well.
This is the front copper layer of the slave PCB :
This is the back copper layer of the slave PCB :
PCB Assembly :
I Got the major components from digikey, like the Lora, esp32c3 and esp32h2 mini. Then the rest I either locally sourced it or I already had in my maker bag.
Most of the assembly was straight forward, except the esp32c3/esp32H2 mini. They don’t have castellated holes similar to the RFM Lora module, which I didn’t realise would be a big challenge while designing the board.
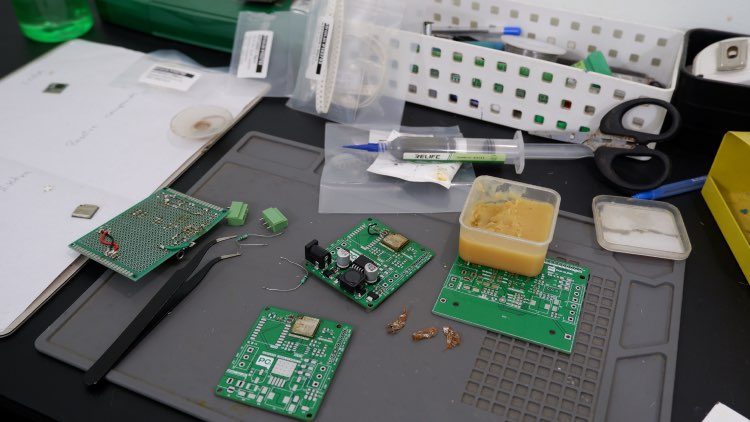
I had to sacrifice few of the esp32c3 before I could get them soldered properly, but once I got the hang of it rest of the soldering and assembly process was pretty easy!
Master Node PCB:
Slave Node PCB:
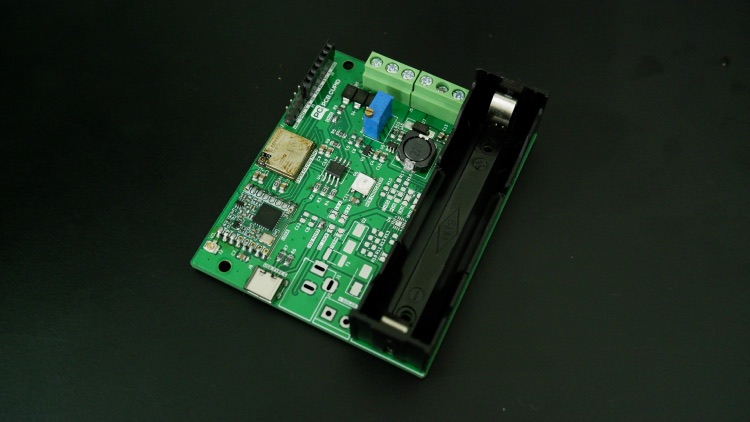
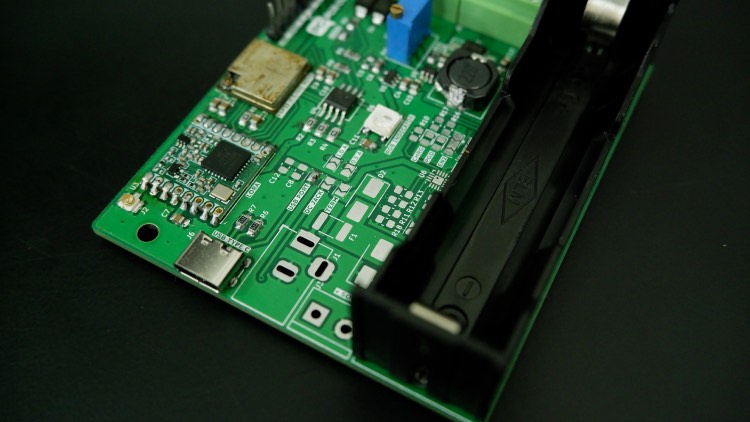
I did have a hiccup with the slave node, the Bq24074 did not arrive on time. So I just left the connection for those pins and soldered the rest of the board. The board currently won’t support solar charging, but you can always power the board with USB-C when you want the slave in a batteryless situation.
Unsoldered Power Management
Code :
To test the hardware and get the basic functionality of the PCB. I’m writing the code completely in arduinoIDE and these are the features that I’m implementing in the code:
- Slave Node
- Get NPK sensor values over RS485
- Send NPK values over LORA
- Randomly SET RGB value
- Send RGB value over LORA
- Master Node
- Receive NPK values over LORA
- Receive RGB values over LORA
- Read RSSI value of slave
- Read the energy meter value over RS485/MODBUS
- Send energy meter reading and NPK value to cloud
- Set the received RGB value
- Set the brightness of RGB based on RSSI value
Note1 : Currently, this code is not concentrating much on battery optimization for the slave. The slave module sends the data over LORA every 15 seconds for demo purposes, but in deployment, the slave module would go to sleep for an hour after sending the data each time.
Note2: To make the Lora work with esp32c3 you need to modify the lora library by sandeepmistry. In the Lora.cpp file replace _spi.begin() with _spi.begin(0,10,1,3).
Required Library :
- https://github.com/sensidev/arduino-modbus-master
- https://github.com/sandeepmistry/arduino-LoRa
- https://github.com/knolleary/pubsubclient
- https://github.com/arduino-libraries/Arduino_JSON
- https://github.com/adafruit/Adafruit_NeoPixel
- https://github.com/plerup/espsoftwareserial
Master Code Explanation
Setup() Function:
- Serial Communication Initialization: Begins serial communication at a baud rate of 115200.
- Modbus Setup: Initializes the Modbus communication for the energy meter.
- Pixel LED Initialization: Sets up the NeoPixel LED.
- LoRa Initialization: Initializes LoRa communication.
- WiFi Setup: Connects to the specified WiFi network.
- MQTT Initialization: Sets up the MQTT connection with the specified MQTT server.
Loop() Function:
- LoRa Packet Reception: Listens for incoming LoRa packets.
- MQTT Connection Check: Checks if the MQTT client is connected and reconnects if necessary.
- Packet Processing: Parses received packets, extracts sensor data in JSON format, retrieves energy-related data from the energy meter, controls the RGB LED based on received data, and publishes sensor data to the MQTT broker.
Helper Functions:
- void setup_wifi(): Handles the WiFi connection setup.
- void reconnect(): Manages the reconnection to the MQTT broker if the connection is lost.
- void modbusPreTransmission(): Sets the Modbus communication to transmission mode.
- void modbusPostTransmission(): Sets the Modbus communication to receive mode.
- float emRead(uint16_t ra): Reads data from the energy meter using Modbus and returns the reading.
Key Operations:
- Reading LoRa Packets: Reads incoming LoRa packets, parses them as JSON, extracts sensor data, and processes them to control the RGB LED and publish sensor data to the MQTT broker.
- Energy Meter Readings: Fetches voltage, current, and frequency readings from the energy meter using Modbus.
Slave Code Explanation
Setup() Function:
- Serial Initialization: Starts serial communication.
- Sensor Initialization: Begins communication with the sensor at 9600 baud rate.
- Pin Mode Setup: Configures the data direction pin for RS485 as an output and sets it to a LOW state.
- Error Handling: Checks if the sensor object is initialized correctly.
- Pixel LED Initialization: Initializes the NeoPixel LED.
- LoRa Initialization: Configures LoRa communication at 868 MHz.
Loop() Function:
- Periodic Sensor Reading: Obtains sensor values (NPK) every 15 seconds.
- RGB LED Control: Sets a random RGB color for the LED and displays it.
- Sensor Reading via RS485: Requests sensor readings from the NPK sensor using RS485 communication.
- Data Packaging: Packages the obtained sensor values and RGB color data into a JSON format.
- LoRa Data Transmission: Sends the packaged data via LoRa communication.
- Update Timing: Updates the last sensor read time.
Helper Function :
- Sensor Data Request: Sends a request to the sensor using RS485 communication.
- Waiting for Sensor Response: Waits for and reads the sensor response data.
- Data Processing: Interprets the received byte data and converts it into a combined float value.
- Debugging Outputs: Prints out relevant sensor byte responses and the calculated value for debugging purposes.
Overall Operation
- The code periodically reads sensor data (NPK) and a random RGB color.
- It sends this data through LoRa communication after packaging it into a JSON format.
- The sensor data is obtained by sending requests via RS485 communication and interpreting the received responses.
Cloud setup
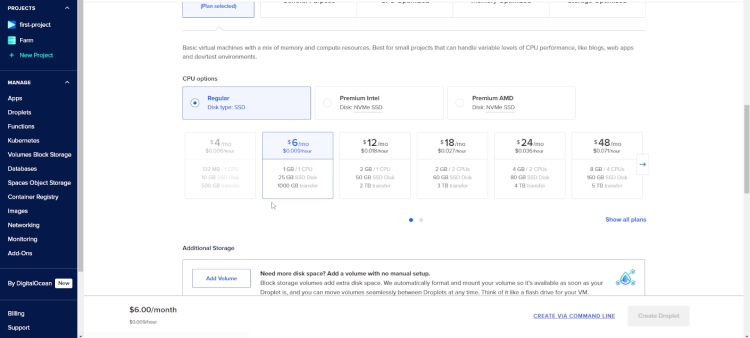
There are tons of cloud platforms to choose from for IoT, but it gets very expensive very soon as we try to scale up. Therefore, I want to build a custom cloud platform which i can scale effortlessly and keep it cost efficient. To build this custom IoT platform, I chose Digital Ocean (running an Ubuntu server) and Node Red.
Currently The platform is running on this URL : http://165.232.185.212:1880/ui
Later, I can connect a domain to this URL, but I won’t be running this server for too long, as it’s only for demo purposes.
Ubuntu virtual machine on Digital Ocean
Node Red Editor running on cloud
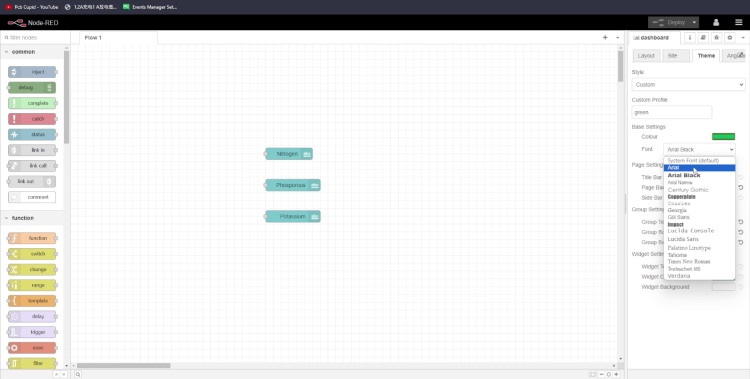
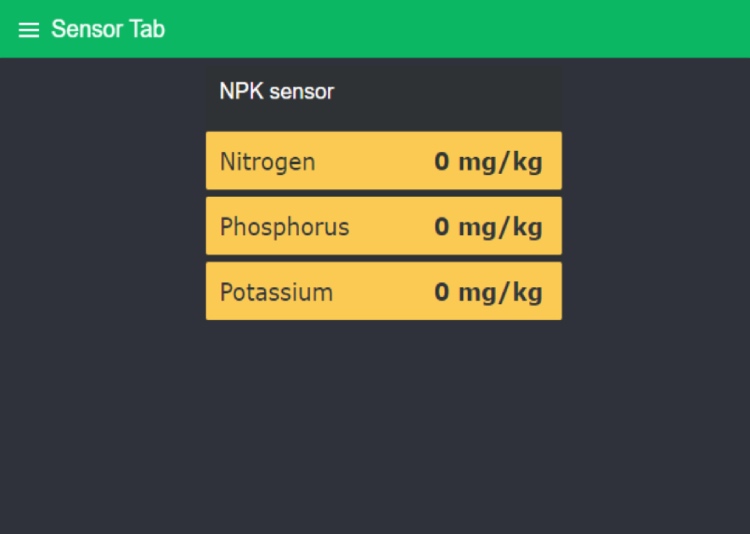
Node Red DashBoard (Sensor Tab):
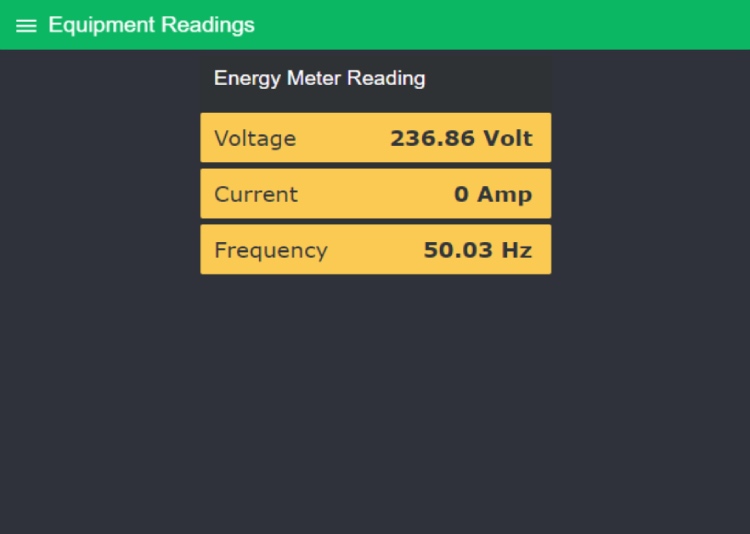
Node Red DashBoard (Energy Meter Tab):
Here’s an explanation project on Circuit Digest, how to implement NodeRed on a Raspberry Pi. It's a fairly similar process, except I’ll be running everything on a virtual machine on a digital ocean server.
If you want to replicate the exact flow as mine, you can import this Node Red Flow
Note: You need to update the Mqtt username and Mqtt password after importing the flow!
3D printed parts
I have designed the case for this project using the online cloud based application called OnShape.
Just to experiment with the 3d printed models, I have designed the case in 2 different ways. Master Node case, focuses more on the functionality of the case where as the salve Node case, focuses more on the form factor and the appearance.
Master Node Case:
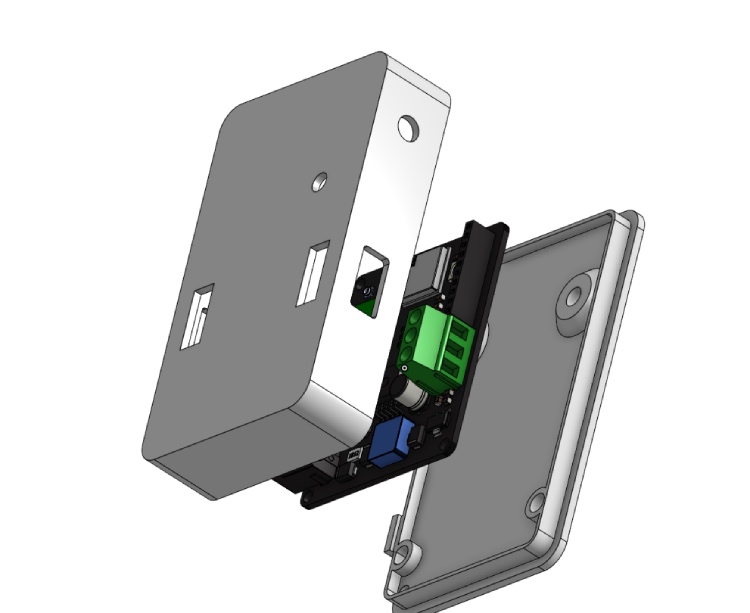
Slave Node Case:
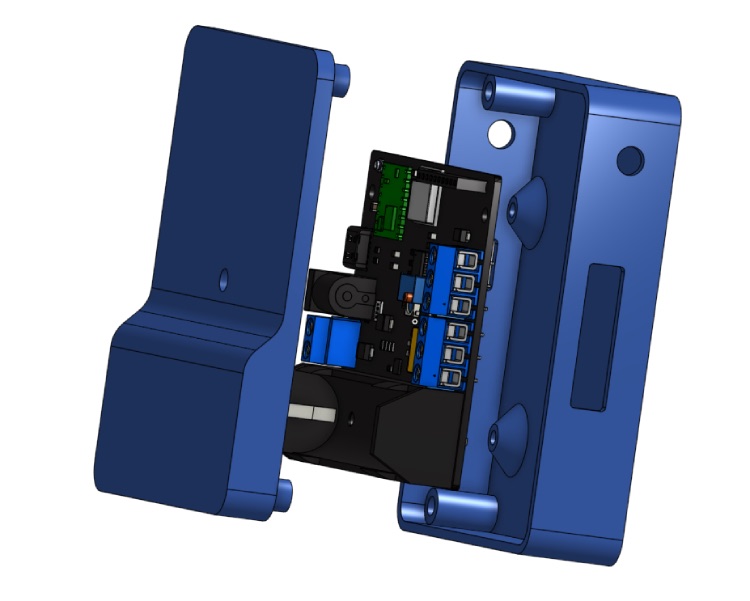
I sliced the model using Prusa for ender 3v2 3d printer. Unfortunately I wasn’t able to use ABS material for the case, currently both the case were printed in orange PLA at 210C (Nozzle) and 65c (Bed) with layer height of 2.4mm. The total time to print all the 4 parts is around 6-8hrs.
You can download the STL models for this case using the link provided.
Master Case:

Slave Case:

Final Assembly
This assembly was very smooth, the case is designed to easily fit the PCB and it has good tolerance on the holes and the spacing around the PCB. The PCB and the 3d printed part is held together with heat inserts.
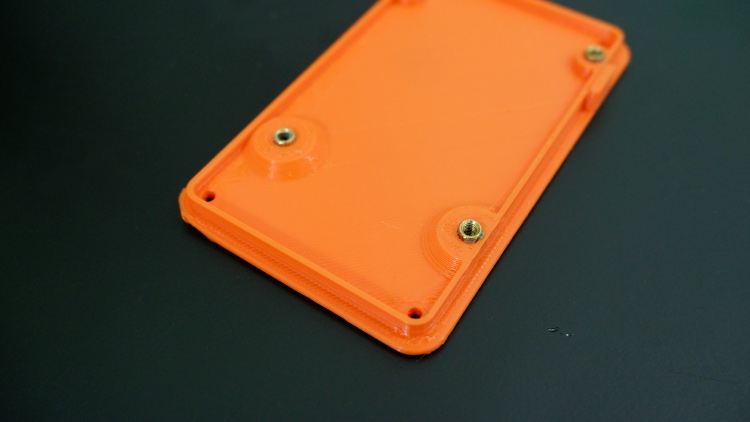
Master Node Assembly - 1
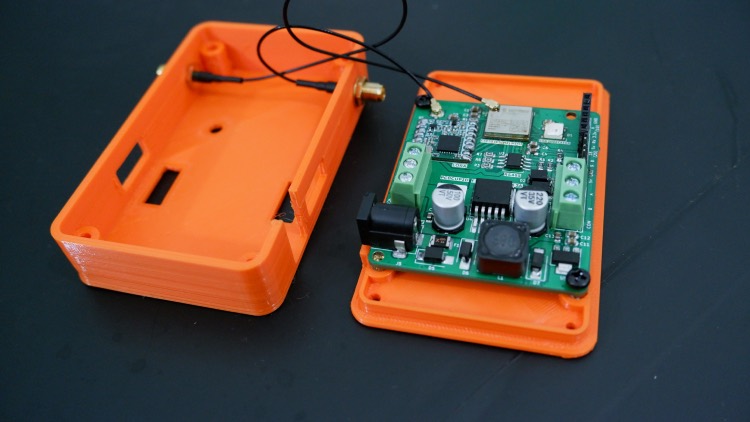
Master Node Assembly - 2
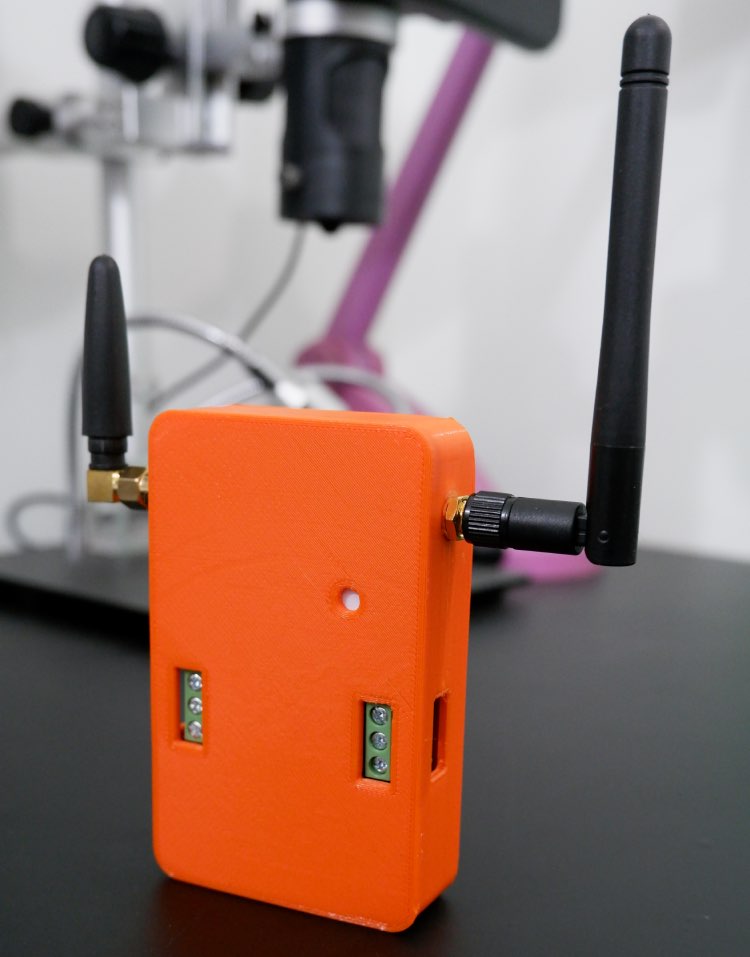
Master Node Assembly - 3
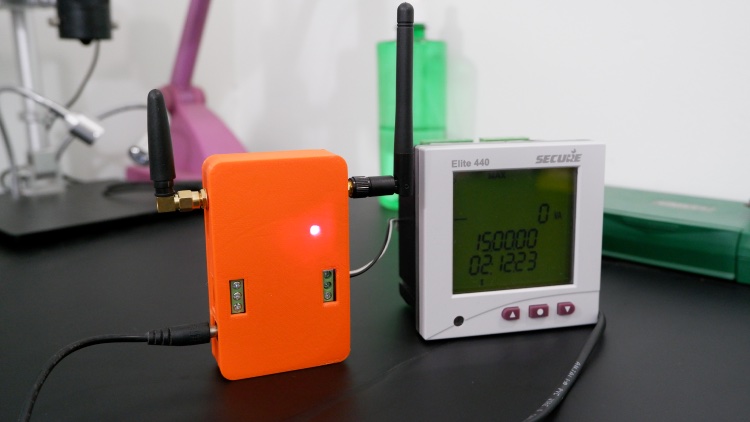
Slave Node Assembly - 1
Note: Since there is no BQ24074 Ic, there is no way to manage the battery, to prevent battery from over discharge I have added a slide switch to completely disconnect the battery from circuit when not in use.
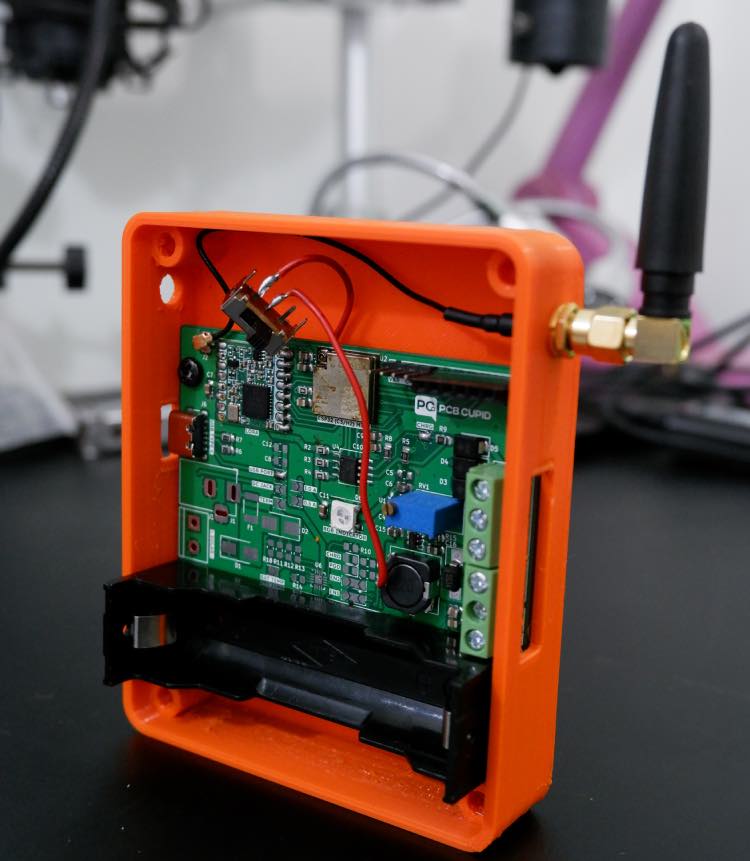
Slave Node Assembly - 2
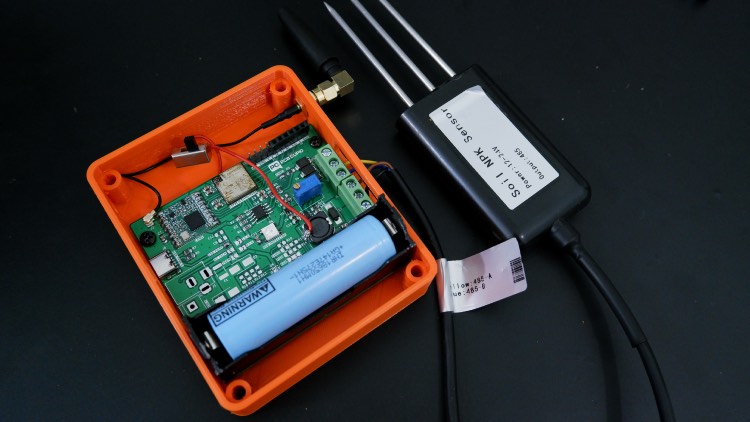
Slave Node Assembly - 3
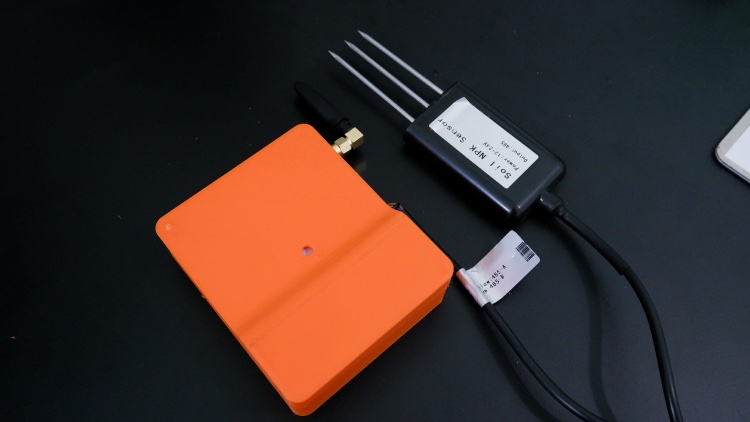
Working Setup & explanation
This setup works both indoor and outdoor condition, for this particular demo I have setup the slave and the master node inside my room.
Where the NPK sensor is placed on a pot to read the live Nitrogen, Phosphorus and potassium value. Along with that the Slave also generates a random RGB color which will be mapped to each reading of the NPK sensor. This way, we can see if the master node received the recent data successfully without checking the cloud platform.
Master Node NPK Setup
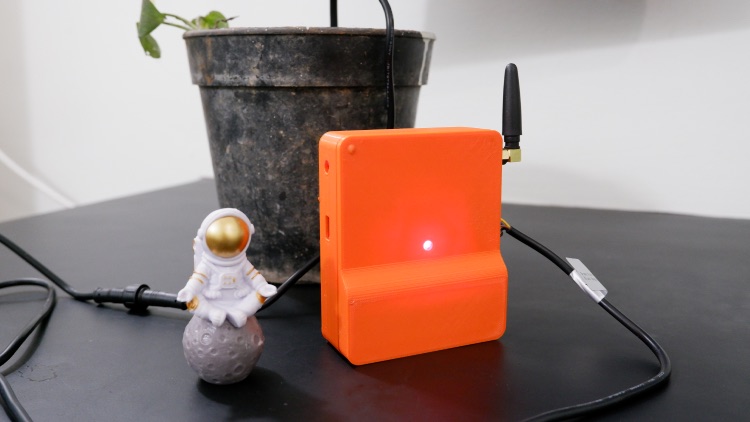
Now for the master setup, I have connected a Industrial grade, RS485 enabled energy meter. Which will simulate the energy meter used in industries or other harsh environments. Once the master node recieve the data from the slave, it will also request the energy meter to provide current, voltage and frequency of the live supply (it can also produce wattage, since currently the energy meter isn’t connected to any load it will always read zero).
Master Node EM Setup
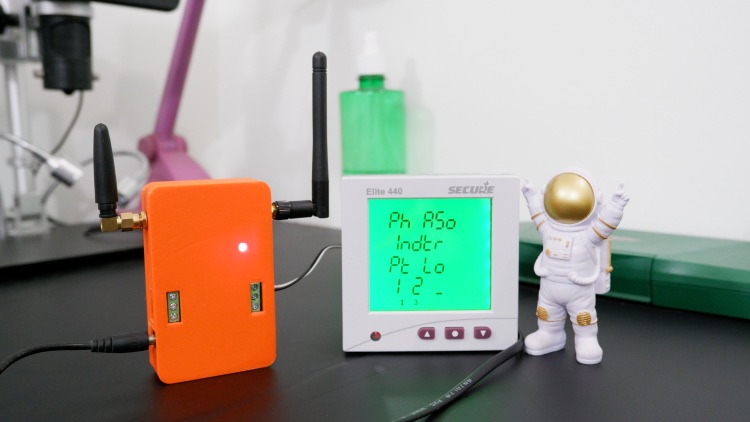
Once it has all the data in hand, it will transfer the data to the custom built cloud platform via MQTT.
Finally we can watch all this in real time using the Node Red DashBoard.
Node RED Dashboard


Complete Project Code
//Github Link for full code
//https://github.com/pcbcupid/Lora-Wireless-Sensor-Network/
//Master Node Code :

#include <WiFi.h>

#include <PubSubClient.h>

// To Run the RS485

#include <SoftwareSerial.h>

// Energy Meter uses Modbus protocol

#include <ModbusMaster.h>

// To Run Lora

#include <SPI.h>

#include <LoRa.h>

// RGB LED Control

#include <Adafruit_NeoPixel.h>

// To Package sensor data

#include <ArduinoJson.h>

//Lora SPI Pin configuration

#define SS 3

#define RST 2

#define DIO 6

#define DTR 5

// Replace the next variables with your SSID/Password combination

const char* ssid = "Your SSID";

const char* password = "Your Password";

const char* mqtt_server = "Your cloud IP address";

WiFiClient espClient;

PubSubClient client(espClient);

long lastMsg = 0;

char msg[50];

int value = 0;

Adafruit_NeoPixel pixels(1, 19, NEO_GRB + NEO_KHZ800);

SoftwareSerial emSerial(4, 7);

ModbusMaster emNode;

StaticJsonDocument<128> doc;

void setup() {

  //Serial setup

  Serial.begin(115200);

  // Modbus for energy meter setup

  pinMode(DTR, OUTPUT);

  digitalWrite(DTR, LOW);

  emSerial.begin(9600, EspSoftwareSerial::SWSERIAL_8E1);

  emNode.begin(1, emSerial);

  //  callbacks allow us to configure the RS485 transceiver correctly

  emNode.preTransmission(modbusPreTransmission);

  emNode.postTransmission(modbusPostTransmission);

  pixels.begin();

  pixels.clear();

  LoRa.setPins(SS, RST, DIO);  // set CS, reset, IRQ pin

  if (!LoRa.begin(868E6)) {  // initialize ratio at 868 MHz

    Serial.println("LoRa init failed. Check your connections.");

    while (true)

      ;  // if failed, do nothing

  }

  setup_wifi();

  client.setServer(mqtt_server, 1883);

}

void loop() {

  // put your main code here, to run repeatedly:

  // try to parse packet

  int packetSize = LoRa.parsePacket();

  String input = "";

  if (!client.connected()) {

    reconnect();

  }

  client.loop();

  if (packetSize) {

    // received a packet

    Serial.print("Received packet'");

    // read packet

    while (LoRa.available()) {

      input = LoRa.readString();

      Serial.println(input);

    }

    // print RSSI of packet

    Serial.print("' with RSSI ");

    int rssi = LoRa.packetRssi();

    int RGBbrigtness = map(abs(rssi),100,20,10,100);

    erial.println(rssi);

    DeserializationError error = deserializeJson(doc, input);

    if (error) {

      Serial.print("deserializeJson() failed: ");

      Serial.println(error.c_str());

      return;

    }

    float nitro = doc["nitro"];

    float phos = doc["phos"];

    float pot = doc["pot"];

    int R = doc["R"];

    int G = doc["G"];

    int B = doc["B"];

    float voltage = emRead(109);

    float current = emRead(121);

    float frequency = emRead(171);

    Serial.printf("EM reading -> Voltage : %f Current : %f Frequency %f ", voltage, current, frequency);

    Serial.println();

    pixels.setPixelColor(0, pixels.Color(R, G, B));

    pixels.setBrightness(RGBbrigtness);

    pixels.show();  // Send the updated pixel colors to the hardware.

    char tempString[8];//temprory String

    //publish the data to mqtt

    dtostrf(nitro, 1, 2, tempString);

    client.publish("n", tempString);

    dtostrf(phos, 1, 2, tempString);

    client.publish("p", tempString);

    dtostrf(pot, 1, 2, tempString);

    client.publish("k", tempString);

    dtostrf(voltage, 1, 2, tempString);

    client.publish("v",tempString);

    dtostrf(current, 1, 2, tempString);

    client.publish("c", tempString);

    dtostrf(frequency, 1, 2, tempString);

    client.publish("f", tempString);

  }

}

void setup_wifi() {

  delay(10);

  // We start by connecting to a WiFi network

  Serial.println();

  Serial.print("Connecting to ");

  Serial.println(ssid);

  WiFi.begin(ssid, password);

  while (WiFi.status() != WL_CONNECTED) {

    delay(500);

    Serial.print(".");

  }

  Serial.println("");

  Serial.println("WiFi connected");

  Serial.println("IP address: ");

  Serial.println(WiFi.localIP());

}

void reconnect() {

  // Loop until we're reconnected

  while (!client.connected()) {

    Serial.print("Attempting MQTT connection...");

    // Attempt to connect

    if (client.connect("MasterNode","Your mqtt username","your mqtt passworrd")) {

      Serial.println("connected");

    } else {

      Serial.print("failed, rc=");

      Serial.print(client.state());

      Serial.println(" try again in 5 seconds");

      // Wait 5 seconds before retrying

      delay(5000);

    }

  }

}

// Pin 5 made high for Modbus transmision mode

void modbusPreTransmission() {

  delay(500);

  digitalWrite(DTR, HIGH);

}

// Pin 5 made low for Modbus receive mode

void modbusPostTransmission() {

  digitalWrite(DTR, LOW);

  delay(500);

}

float emRead(uint16_t ra) {

  uint16_t data[2];

  float reading = 0.0;

  uint8_t result = emNode.readHoldingRegisters(ra, 2);

  if (result == emNode.ku8MBSuccess) {

    data[0] = emNode.getResponseBuffer(0x00);

    data[1] = emNode.getResponseBuffer(0x01);

    reading = *((float*)data);

    emNode.clearResponseBuffer();

  } else {

    Serial.printf("Failed Node-%d, Response Code: ", index);

    Serial.print(result, HEX);

    Serial.println("");

    delay(5000);

  }

  return reading;

}

//Slave Node Code :

// To Run the RS485

#include <SoftwareSerial.h>

// To Run Lora

#include <SPI.h>

#include <LoRa.h>

// RGB LED Control

#include <Adafruit_NeoPixel.h>

// To Package sensor data

#include <ArduinoJson.h>

// RS485 Configuration for NPK Sensor

#define sensorFrameSize 11

#define sensorWaitingTime 1000

#define sensorByteResponse 0x0E

//Lora SPI Pin configuration

#define SS 3

#define RST 2

#define DIO 6

//Data direction pin for RS485

const int dtr = 5;

// RS485 Byte Address Request to Sensor

unsigned char nReq[8] = { 0x01, 0x03, 0x00, 0x1E, 0x00, 0x01, 0xE4, 0x0C };  //Nitrogen

unsigned char pReq[8] = { 0x01, 0x03, 0x00, 0x1F, 0x00, 0x01, 0xB5, 0xCC };  //Phosporous

unsigned char kReq[8] = { 0x01, 0x03, 0x00, 0x20, 0x00, 0x01, 0x85, 0xC0 };  //Potassium

unsigned char byteResponse[11] = {};

unsigned long lastSensorRead = 0;

uint8_t R = 0;

uint8_t G = 0;

uint8_t B = 0;

SoftwareSerial sensor(4, 7);

Adafruit_NeoPixel pixels(1, 19, NEO_GRB + NEO_KHZ800);

StaticJsonDocument<96> doc;

void setup() {

  // put your setup code here, to run once:

  Serial.begin(115200);

  sensor.begin(9600);

  pinMode(dtr, OUTPUT);

  digitalWrite(dtr, LOW);

  if (!sensor) {  // If the object did not initialize, then its configuration is invalid

    Serial.println("Invalid pin configuration, check config");

    while (1) {  // Don't continue with invalid configuration

      delay(1000);

    }

  }

  pixels.begin();

  pixels.clear();

  LoRa.setPins(SS, RST, DIO);  // set CS, reset, IRQ pin

  if (!LoRa.begin(868E6)) {  // initialize ratio at 868 MHz

    Serial.println("LoRa init failed. Check your connections.");

    while (true)

      ;  // if failed, do nothing

  }

}

void loop() {

  //Get the sensor value every 15secs  and send it through lora

  if (millis() - lastSensorRead >= 15000) {

    String packagedData = "";

    R = random(256);

    G = random(256);

    B = random(256);

    Serial.println("Setting the color of RGB LED");

    Serial.printf("The Value of R: %d G: %d B: %d",R,G,B);

    Serial.println();

    pixels.setPixelColor(0, pixels.Color(R, G, B));

    pixels.show();  // Send the updated pixel colors to the hardware.

    float N = getSensorValue(nReq);

    float P = getSensorValue(pReq);

    float K = getSensorValue(kReq);

    Serial.printf("Sensor Value, N: %f P : %f K : %f",N,P,K);

    //Package all the data

    doc["N"] = N;

    doc["P"] = P;

    doc["K"] = K;

    doc["R"] = R;

    doc["G"] = G;

    doc["B"] = B;

    serializeJson(doc, packagedData);

    Serial.println("Sending data through Lora!");

    Serial.println(packagedData);

    LoRa.beginPacket();

    LoRa.print(packagedData);

    LoRa.endPacket();

    lastSensorRead = millis();

  }

}

float getSensorValue(unsigned char req[]) {

  //request reading from the sensor

  sensor.flush();

  digitalWrite(dtr, HIGH);

  sensor.write(req, 8);

  digitalWrite(dtr, LOW);

  // Wait for sensor to response

  unsigned long resptime = millis();

  while ((sensor.available() < sensorFrameSize) && ((millis() - resptime) < sensorWaitingTime)) {

    delay(1);

  }

  while (sensor.available()) {

    for (int n = 0; n < sensorFrameSize; n++) {

      byteResponse[n] = sensor.read();

      delay(1);

    }

  }

  //Print the byte response!

  for (int i = 0; i < 7; i++) {

    Serial.print(byteResponse[i], HEX);

    Serial.print(" ");

  }

  float combined_value = 0.0;

  //Convert Hex value to Decimal

  if (byteResponse[2] == 0x02) {

    combined_value = (byteResponse[3] << 8) | byteResponse[4];

    Serial.println("calculating 2 byte response");

  } else if (byteResponse[2] == 0x04) {

    combined_value = (byteResponse[5] << 8) | byteResponse[6];

    Serial.println("calculating 4 byte response");

  }

  for (int i = 0; i < 11; i++) {

    byteResponse[i] = 0;

  }

  Serial.println("Value : " + String(combined_value));

  return combined_value;

}

