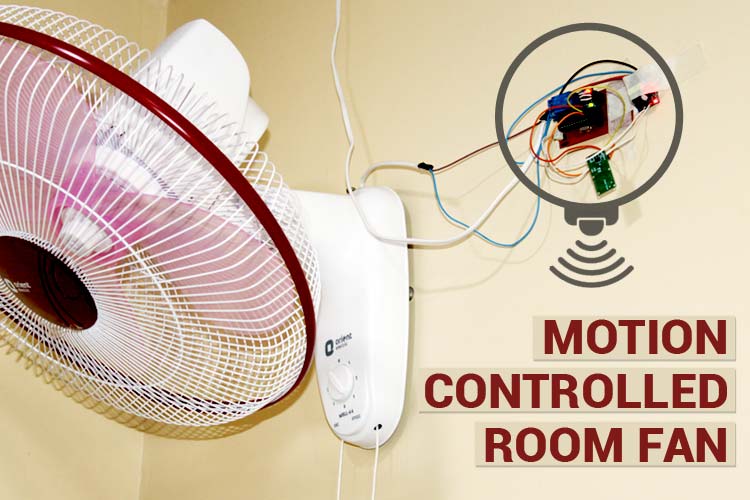
Here we are going to build a motion-controlled fan project using ATmega328 and RCWL-0516 Doppler RADAR Motion Sensor. This project will eliminate the need of manually turning on/off the room fan while entering or leaving the room as it can automatically turn on the fan upon detecting the motion. For example, once motion is detected, it will turn on the fan for 30 seconds. Then, after this period of time, it will again check for motion, and if the motion is detected again, then it will be triggered again and stay on for 30 seconds again. This cycle will continue as long as needed. And if we do not detect the motion, then it will turn off the fan. Check out our previously built microcontroller projects to learn more.
Also check our previous Automatic Fan Controller projects:
- Arduino Temperature Control - Adjust Fan Speed based on Temperature
- Simple Fan Regulator Circuit to Control the Speed of AC Fan
- IoT Based AC Fan Speed Control using Smart Phone with NodeMCU and Google Firebase
- AC Fan Speed Control using Arduino and TRIAC
- IoT Based Smart Fan Control using ESP8266 and Blynk
- Temperature Controlled DC Fan using Thermistor
Component Requirement for Motion Controlled Room Fan
Project Used Hardware
- Atmega328 Microcontroller IC,
- RCWL-0516 Doppler RADAR Motion Sensor,
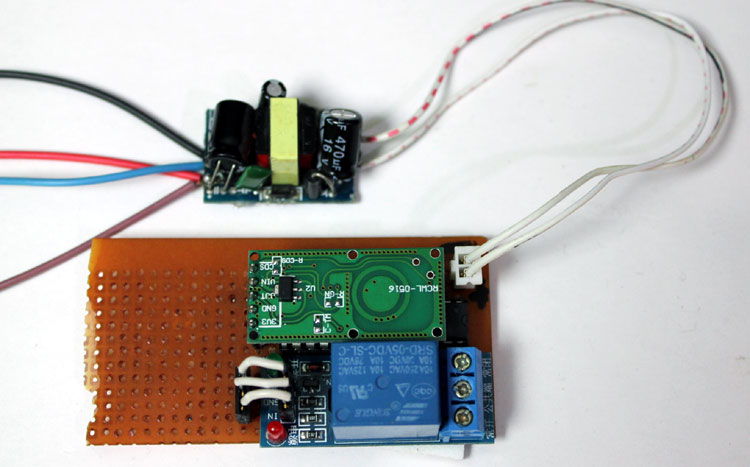
- 220V AC to 5V DC converter,
- Relay Module,
- 16MHz Crystal Oscillator,
- 2 x 22pf Ceramic Capacitor,
- 10K ohm Resistor
Project Used Software
- Arduino IDE
Project Hardware Software Selection
Atmega328P Microcontroller IC: ATmega328P Microcontroller is the most widely used standalone Atmega IC for electronics projects. Here I used this microcontroller IC instead of Arduino Uno to save some space.
RCWL-0516 Doppler RADAR Sensor: The RCWL-0516 Doppler RADAR Motion Sensor was launched as an alternative to the common PIR motion sensor. The reason behind using this sensor instead of PIR sensor is that it has a 360-degree detection area with no blind spot. It can also detect motion through walls and other materials and have a sensitivity range of 7 meters.
Relay Module: A Relay Module is an electromechanical device that allows Arduino, ESP, and other Microcontrollers to control big electrical loads. We have used a Relay Module in this project to turn on/off the lamp according to the motion detected by the sensor.
5V Power Supply Module: As the project setup is directly powered through mains supply, here we used 220 Ac to 5V DC converter to get 5V to power the Atmega 328P and other components that work on 5V.
Circuit Diagram
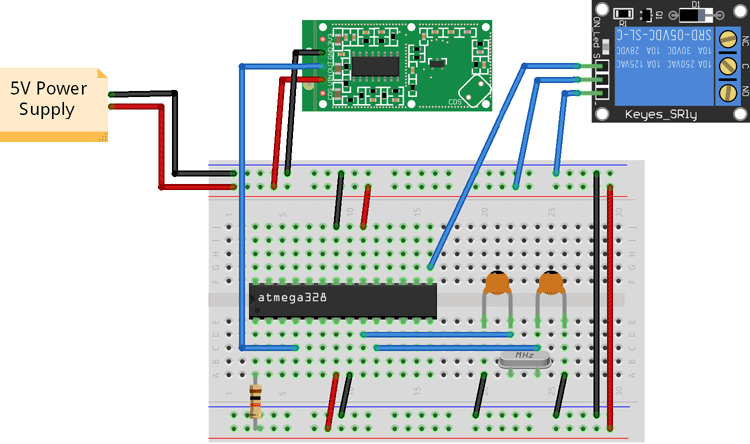
Doppler radar Sensor’s OUT Pin is connected to Atmega’s PD2 pin. The IN pin of the Relay Module is connected to the PB1 pin of Atmega328. A fan is connected to the main supply through the relay. One terminal of the fan is connected to one wire of the main supply. The other terminal of the fan is connected to the Normally Open contact of the Relay Module. Common contact of the Relay is connected to the GND of the main’s supply. The 10K resistor that is connected to the reset pin of Atmega is used to prevent the device from randomly resetting whenever there’s noise on the pin. The 16MHz crystal oscillator and two 22pf ceramic capacitors are used to provide the Atmega with crucial timing information.

Complete Project Code
#include <avr/io.h>
#include <util/delay.h>
//  #define F_CPU 100000UL
int main(void)
{
   DDRB = 0xff;   //PORTB output
   PORTB = 0x00;  //PORTB '0'
   DDRD = 0x00;   //PORTD input
   PORTD = 0xff;  //PORTD internall pullup
   while(1)
   {
    if(!(PIND & (1<<PD2)))
      PORTB = PORTD;    //when button pressed, turn ON led
    else
      //_delay_ms(2000);
      PORTB = 0x00;                //when not pressed, turn OFF led
      _delay_ms(1000);
   }
} 


