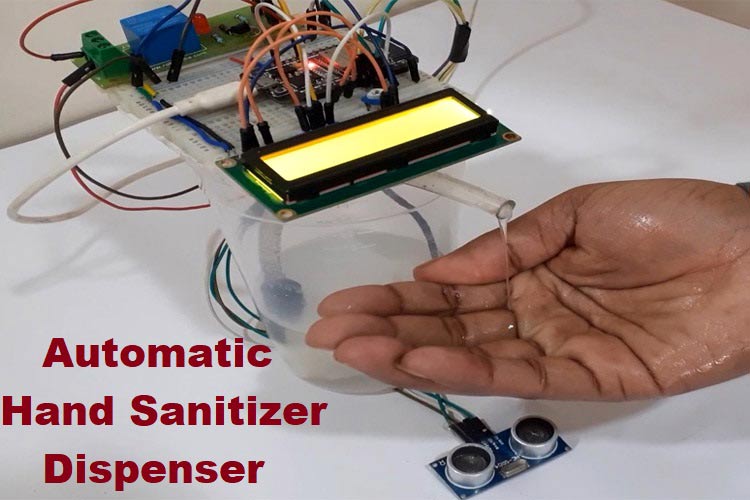
Corona Virus (Covid19) is wreaking havoc in the world. Almost every country is suffering from the Corona Virus. WHO has already announced it a Pandemic disease and many cities are under lockdown situation, people can’t step out of their homes, and thousands have lost their lives. Many websites are providing live updates of the coronavirus cases like Microsoft’s Tracker, Esri’s Covid19 Tracker, etc.
In this project, we will build an Auto Hand Sanitizer Dispenser with an LCD which also shows the live count of Coronavirus cases. This project will use ESP32, Ultrasonic Sensor, 16x2 LCD Module, Water pump, and Hand Sanitizer. We are using Esri’s API Explorer to get the live data of Covid19 infected people. An ultrasonic sensor is used to check the presence of hands below the outlet of the sanitizer machine. It will continuously calculate the distance between the sanitizer outlet and itself and tells the ESP to turn on the pump whenever the distance is less than 15cm to push the sanitizer out.
ESP32 is used as the main controller, it is a Wi-Fi module that can easily connect to the internet. We previously used it to build many IoT based projects using ESP32.
Components Required
- ESP32 Dev Module
- Ultrasonic Sensor
- 16*2 LCD Display
- Relay Module
- Mini DC Submersible Pump
- Hand Sanitizer
API link for getting the Corona Live Data
Here we need to get the data from the internet and then send it to ESP32 to display it on 16x2 LCD. For that, an HTTP get request is invoked to read the JSON file from the internet. Here we are using the API provided by Coronavirus Disease GIS Hub. You can easily compile the correct query URL to get the total Confirmed and recovered cases for India and can also change the country/Region if you want to use this for a different country.
![]()
![]()
Now click on “Try Now” or paste the query URL into a new browser, the output of that query will look like this:
{"objectIdFieldName":"OBJECTID","uniqueIdField":{"name":"OBJECTID","isSystemMaintained":true},"globalIdFieldName":"","geometryType":"esriGeometryPoint","spatialReference":{"wkid":4326,"latestWkid":4326},"fields":[{"name":"Country_Region","type":"esriFieldTypeString","alias":"Country/Region","sqlType":"sqlTypeOther","length":8000,"domain":null,"defaultValue":null},{"name":"Province_State","type":"esriFieldTypeString","alias":"Province/State","sqlType":"sqlTypeOther","length":8000,"domain":null,"defaultValue":null},{"name":"Confirmed","type":"esriFieldTypeInteger","alias":"Confirmed","sqlType":"sqlTypeOther","domain":null,"defaultValue":null},{"name":"Recovered","type":"esriFieldTypeInteger","alias":"Recovered","sqlType":"sqlTypeOther","domain":null,"defaultValue":null},{"name":"Deaths","type":"esriFieldTypeInteger","alias":"Deaths","sqlType":"sqlTypeOther","domain":null,"defaultValue":null},{"name":"Active","type":"esriFieldTypeInteger","alias":"Active","sqlType":"sqlTypeOther","domain":null,"defaultValue":null}],"features":[{"attributes":{"Country_Region":"India","Province_State":null,"Confirmed":194,"Recovered":20,"Deaths":4,"Active":170}}]}
After getting the JSON data, now generate the code to read the JSON data and phrase it according to our needs. For that, go to the ArduinoJson Assistant and paste the JSON data in the Input section.
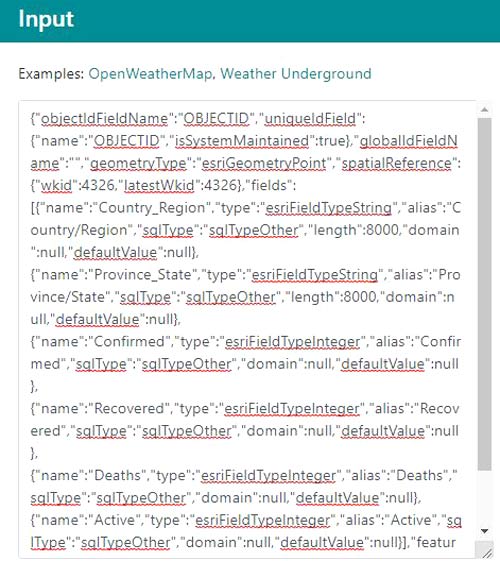
Now scroll down to the parsing program and copy the code section that is useful for you. I copied the below variables as I only needed the confirmed and recovered cases in India.
![]()
![]()
Circuit Diagram
The complete circuit diagram for this Covid19 Tracker & automatic hand sanitizer dispenser machine is given below
The water pump is connected to the ESP32 through a relay module. Vcc and GND pins of the relay are connected to Vin and GND pins of ESP32 while the input pin of the relay is connected to the D19 pin of ESP32. Trig and Echo pins of the Ultrasonic sensor are connected to D5 and D18 Pins of Arduino.
Complete connections are given in the below table.
| LCD | ESP32 |
| VSS | GND |
| VDD | 5V |
| VO | Potentiometer |
| RS | D22 |
| RW | GND |
| E | D4 |
| D4 | D15 |
| D5 | D13 |
| D6 | D26 |
| D7 | D21 |
| A | 5V |
| K | GND |
| Ultrasonic Sensor | ESP32 |
| Vcc | Vin |
| GND | GND |
| Trig | D5 |
| ECHO | D18 |
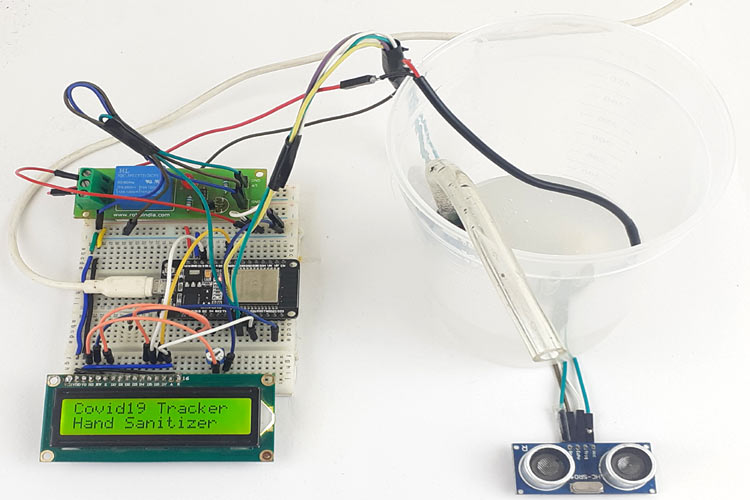
The hardware for this Motion Sensor Hand Sanitizer Dispenser will look like this
Programming ESP32 for Covid19 Tracker
Complete code for Auto Hand Sanitizer and CORONA19 Tracker can be found at the end of the page. Here important parts of the program are explained.
Start the code by including all the required library files. HTTPClient library is used to get the data from the HTTP server. ArduinoJson library is used to phrase the data arrays. Here ArduinoJson library is used to filter the Confirmed cases and Recovered from the data array that we are getting from the server. LiquidCrystal library is used for the LCD display Module.
#include <HTTPClient.h>
#include <WiFi.h>
#include <ArduinoJson.h>
#include <LiquidCrystal.h>
To get the data from the server, NodeMCU ESP32 has to connect with the internet. For that, enter your Wi-Fi SSID and Password in the below lines.
const char* ssid = "Galaxy-M20";
const char* pass = "ac312124";
After that define the pins where you have connected the LCD module, Ultrasonic sensor, and Relay module.
const int rs = 22, en = 4, d4 = 15, d5 = 13, d6 = 26, d7 = 21;
LiquidCrystal lcd(rs, en, d4, d5, d6, d7);
const int trigPin = 5;
const int echoPin = 18;
const int pump = 19;
Now we enter the API link that is generated earlier. Using this link, we will get the total confirmed cases and Recovered cases in India. You can change the country name in the URL according to you.
constchar*url="https://services1.arcgis.com/0MSEUqKaxRlEPj5g/arcgis/rest/services/ncov_cases/FeatureServer/1/query?f=json&where=(Country_Region=%27India%27)&returnGeometry=false&outFields=Country_Region,Confirmed,Recovered";
Now inside the void setup(), define the Trig and Echo pin of Ultrasonic sensor as input pins and Relay pin as an output.
pinMode(trigPin, OUTPUT);
pinMode(echoPin, INPUT);
pinMode(pump, OUTPUT);
To learn more about how Ultrasonic sensor works, check its interfacing with Arduino where we have explained the function of its TRIG and ECHO pin along with how it is used to calculate the distance between any object. Also, check other ultrasonic based projects.
After that, check if the ESP is connected with the Wi-Fi, if not it will wait for ESP to connect by printing “…..” on the serial monitor.
WiFi.begin(ssid, pass);
  while (WiFi.status() != WL_CONNECTED)
  {
    delay(500);
    Serial.print(".");              // print ... till not connected
  }
  Serial.println("WiFi connected");
Inside the void ultra() function we will continuously calculate the distance using an ultrasonic sensor and if the distance is less than or equal to 15 cm, then it will turn on the pump for 2 seconds to push the sanitizer outside through the pipe. Obliviously when someone puts his hands below the outlet pipe, the distance will decrease and it will trigger the pump to turn on.
void ultra(){
  digitalWrite(trigPin, LOW);
  delayMicroseconds(2);
  digitalWrite(trigPin, HIGH);
  delayMicroseconds(10);
  digitalWrite(trigPin, LOW);
  duration = pulseIn(echoPin, HIGH);
  distance = duration * 0.0340 / 2;
  Serial.println("Distance");
  Serial.println(distance);
  if (distance <= 15){
    Serial.print("Opening Pump");
    digitalWrite(pump, HIGH);
    delay(2000);
    digitalWrite(pump, LOW);
    ESP.restart();
    }
}
Now inside the void loop() function, check if JSON file received by the ESP32 by reading it and printing JSON data on the serial monitor using the following lines
int httpCode = https.GET();
  if (httpCode > 0) { //Check for the returning code
 String payload = https.getString();
After that, use the phrasing program generated from ArduinoJson Assistant. This phrasing program will give us the total confirmed and recovered cases in India.
JsonArray fields = doc["fields"];
JsonObject features_0_attributes = doc["features"][0]["attributes"];
long features_0_attributes_Last_Update = features_0_attributes["Last_Update"];
int features_0_attributes_Confirmed = features_0_attributes["Confirmed"];
//int features_0_attributes_Deaths = features_0_attributes["Deaths"];
int features_0_attributes_Recovered = features_0_attributes["Recovered"];
Testing the Automatic Hand Sanitizer with Covid19 Tracker
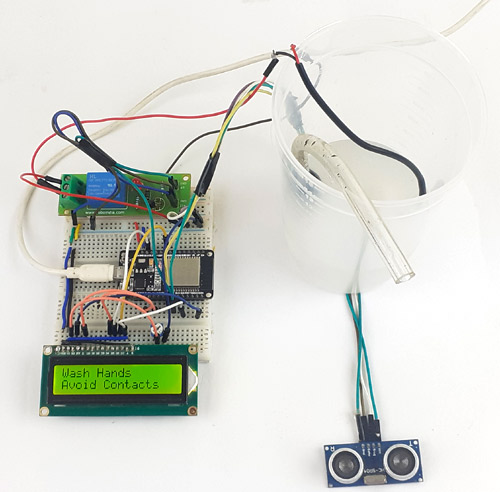
So finally our battery operated hand sanitizer dispenser is ready to test. Just connect the hardware as per circuit diagram and upload the program into ESP32, in the starting you should see the “Covid19 Tracker” & “Hand Sanitizer” message on the LCD and then after few seconds it will display confirmed cases & recovered cases in the LCD screen as shown below.
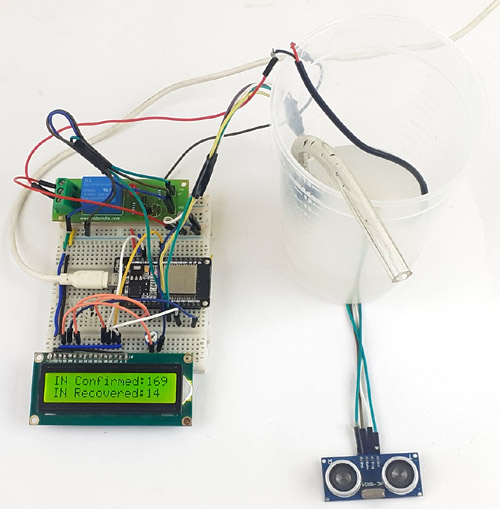
Similar to this, you can get this data for any country by making some changes in the API link. A complete working video and code are given at the end of the page.
Complete Project Code
#include <HTTPClient.h>

#include <WiFi.h>

#include <ArduinoJson.h>

#include <LiquidCrystal.h>

const char* ssid = "Galaxy-M20";

const char* pass = "ac312124";

int count;

const int rs = 22, en = 4, d4 = 15, d5 = 13, d6 = 26, d7 = 21;

LiquidCrystal lcd(rs, en, d4, d5, d6, d7);

const int trigPin = 5;

const int echoPin = 18;

const int pump = 19;

long duration;

int distance;

const char* url = "https://services1.arcgis.com/0MSEUqKaxRlEPj5g/arcgis/rest/services/ncov…";

void setup() {

  Serial.begin(115200);

  delay(2000);

  pinMode(trigPin, OUTPUT);

  pinMode(echoPin, INPUT);

  pinMode(pump, OUTPUT);

  digitalWrite(pump, LOW);

  lcd.begin(16, 2);

  lcd.clear();

  lcd.setCursor(0,0);

  lcd.print("Covid19 Tracker");

  lcd.setCursor(0,1);

  lcd.print("Hand Sanitizer");

  Serial.println("Connecting to ");

  Serial.println(ssid);

  WiFi.begin(ssid, pass);

  while (WiFi.status() != WL_CONNECTED)

  {

    delay(500);

    Serial.print(".");              // print ... till not connected

  }

  Serial.println("WiFi connected");

}

void ultra(){

  digitalWrite(trigPin, LOW);

  delayMicroseconds(2);

  digitalWrite(trigPin, HIGH);

  delayMicroseconds(10);

  digitalWrite(trigPin, LOW);

  duration = pulseIn(echoPin, HIGH);

  distance = duration * 0.0340 / 2;

  Serial.println("Distance");

  Serial.println(distance);

  if (distance <= 15){

    Serial.print("Opening Pump");

    digitalWrite(pump, HIGH);

    delay(2000);

    digitalWrite(pump, LOW);

    ESP.restart();

    }

}

void loop() {

  ultra();

  HTTPClient https;

  String data;

  https.begin(url);

  int httpCode = https.GET();

  if (httpCode > 0) { //Check for the returning code

    String payload = https.getString();

    char charBuf[500];

    payload.toCharArray(charBuf, 500);

    //Serial.println(payload);

    const size_t capacity = JSON_ARRAY_SIZE(1) + JSON_ARRAY_SIZE(4) + JSON_OBJECT_SIZE(1) + 2 * JSON_OBJECT_SIZE(2) + JSON_OBJECT_SIZE(4) + 3 * JSON_OBJECT_SIZE(6) + 2 * JSON_OBJECT_SIZE(7) + 690;

    DynamicJsonDocument doc(capacity);

    deserializeJson(doc, payload);

    JsonArray fields = doc["fields"];

    JsonObject features_0_attributes = doc["features"][0]["attributes"];

    long features_0_attributes_Last_Update = features_0_attributes["Last_Update"];

    int features_0_attributes_Confirmed = features_0_attributes["Confirmed"];

    //int features_0_attributes_Deaths = features_0_attributes["Deaths"];

    int features_0_attributes_Recovered = features_0_attributes["Recovered"];

    if (count < 3){

    //Serial.println(features_0_attributes_Confirmed);

    lcd.setCursor(0, 0);

    lcd.print("IN Confirmed:");

    lcd.print(features_0_attributes_Confirmed);

    //Serial.println(features_0_attributes_Recovered);

    lcd.setCursor(0, 1);

    lcd.print("IN Recovered:");

    lcd.print(features_0_attributes_Recovered);

    }

    if (count > 3){

    lcd.clear();

    lcd.setCursor(0, 0);

    lcd.print("Wash Hands");

    lcd.setCursor(0, 1);

    lcd.print("Avoid Contacts");

    }

    if (count > 6){

    count = 0;

    }

}

  else {

    Serial.println("Error on HTTP request");

  }

  https.end();

  count++;

}
Comments
Innovative idea!
Innovative idea!
How does it tracks the COVID19 ?
can transfer cores to actual chip?
Pls. guide how to burn these codes to Atmega8A-PU controller Chip & also use this Chip actually in PCB. What's the program memory?
Will we need to use Crystal & tact switch with Atmega8A in PCB?


Nice circuit, congratulations ! I would like to ask if it will work on NodeMCU, ESP8266 ? Regards