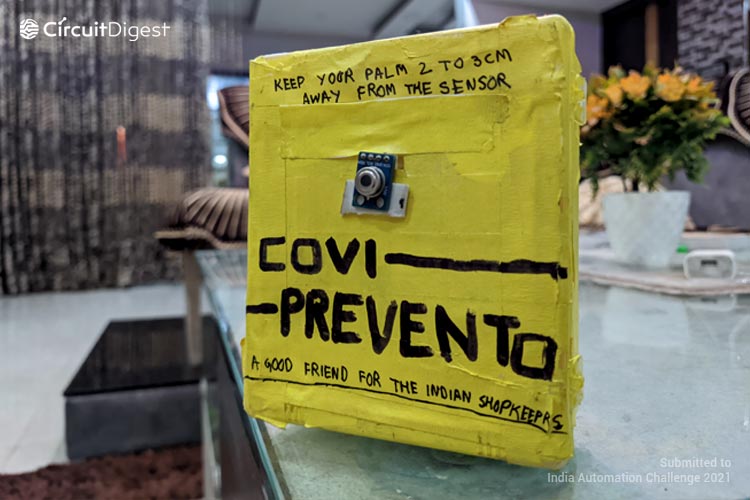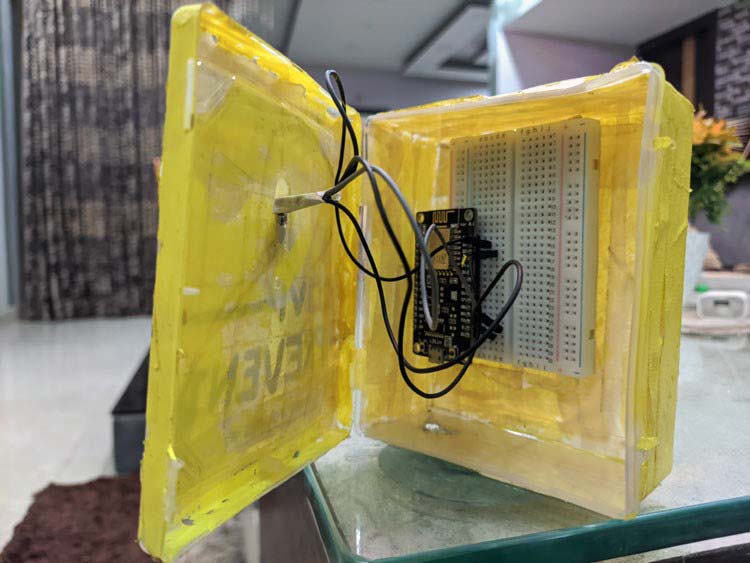
So one day I and my brother was sitting on the sofa and watching the news that the Corona Virus is spreading massively all over the world seeing this made us very worried and we started thinking about this and then another thing came to my mind that in the shops the customers who are coming and the delivery boy or any unknown person coming to our houses can also spread the coronavirus and it is not possible for everyone to have a security guard with infrared temperature gun because it would be very costly. After all, this thing we have decided to make a project which will help the shopkeepers and member of the house from corona and also we got success in making of this project. we named it as Covi-Prevento which prevents the spread of coronavirus. In this project, we have used NodeMCU which is a wi-fi-enabled board, and an MLX90614 Infrared Temperature Sensor which tells the body temperature of the person. when a person comes in front of this the sensor starts reading the body temperature and if the temperature of the person is greater than that of normal temperature then it sends us a notification that "Be Alert!! the body temperature of the person is higher than the normal body temperature" and if the temperature is equal to that of normal body temperature then it sends notification that "Don't Worry !!! the person's body temperature is normal".
Previously, we worked on some digital thermometer projects, check them out,
- Arduino Based Digital Thermometer using MAX30205 Human Body Temperature Sensor
- IoT Based Contactless Body Temperature Monitoring using Raspberry Pi with Camera and Email Alert
- RFID based Contactless Body Temperature Screening using Arduino and MLX90614 IR Temperature Sensor

Component Required for Covi Prevento
Project Used Hardware
- NodeMCU,
- MLX90614 Infrared Temperature Sensor
Project Used Software
- Arduino IDE,
- Blynk
Project Hardware Software Selection
I have used NodeMCU because NodeMCU is an open-source platform based on ESP8266 which can connect objects and let data transfer using the Wi-Fi protocol. and I have used MLX90614 Infrared Temperature Sensor because it is a very low-cost sensor having a range of up to 5cm. And apart from this, I have used Arduino IDE because It is used to write and admin/upload programs to Arduino compatible boards, but also, with the help of third-party cores, other vendor development boards. and Blynk because Blynk is the most popular IoT platform to connect your devices to the cloud. It is well-known for allowing users to design apps to control their IoT devices, analyze telemetry data, and manage your deployed products at scale.
Covi Prevento Circuit Diagram
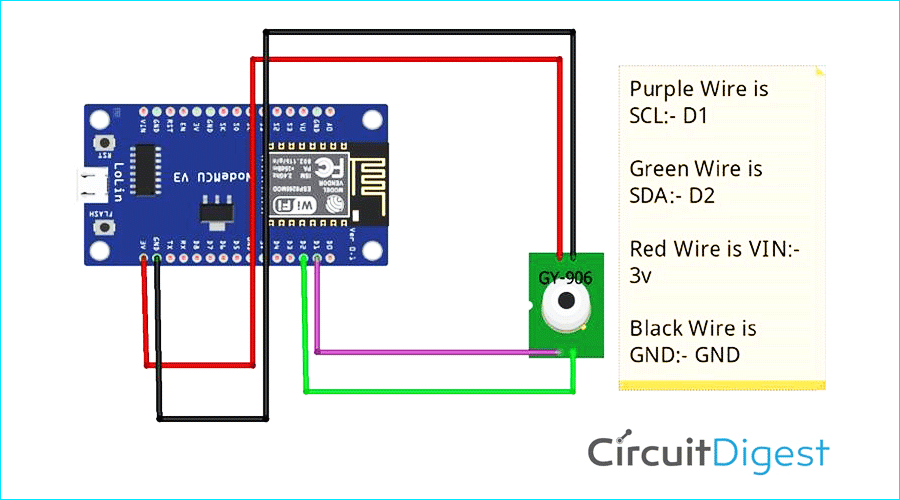
So the Infrared Temperature Sensor has 4 pins namely GND, VIN, SCL, and SDA, GND GND is short for the ground which will get connected to the G pin(G is short for ground) of NodeMCU and VIN is the completely unaltered input power before the regulator (it will be useless if regulated 5v is supplied directly). it will get connected to Vin pin of NodeMCU. SDA The SDA wire is used for sending the actual data back and forth between the master and slave devices. it will get connected to D2 SCL The SCL line carries the clock signal used for communication timing. Pull-up resistors are used to keep both wires in a HIGH state by default. it will get connected to D1
Complete Project Code
#include <Wire.h>
#include <Adafruit_MLX90614.h>                                                                                                                                                                                                                                                                                                                 //Created By Rohan Barnwal
#define BLYNK_PRINT Serial
#include <ESP8266WiFi.h>
#include <BlynkSimpleEsp8266.h>
BlynkTimer timer;
char auth[] = ""; //Auth code sent via Email
char ssid[] = ""; //Wifi name
char pass[] = "";  //Wifi Password
Adafruit_MLX90614 mlx = Adafruit_MLX90614();//Making a variable mlx
void notifyOnThings(){
  if(mlx.readObjectTempC()< 37 && mlx.readObjectTempC()>33  )//mlxreadObjectTempC means the reading of Object Temperature
  {
     Blynk.notify( "Don't Worry !!! the person's body temperature is normal" );//Notification when temperature is normal
  }
  else if(mlx.readObjectTempC()>38) {
    Blynk.notify("Be Alert!! the body temperature of the person is higher than the normal body temperature");//Notification when temperature is high
  }
}
void setup() {
Serial.begin(9600);//Serial Monitor means a monitor from where you can read the values
Blynk.begin(auth, ssid, pass);
timer.setInterval(1L,notifyOnThings);
  Serial.println("Adafruit MLX90614 test");
  mlx.begin();
}
void loop() {
  Serial.print("*C\tObject = ");
  Serial.print(mlx.readObjectTempC()); Serial.println("*C");
  Serial.println();
   Blynk.run();
  timer.run();
}


