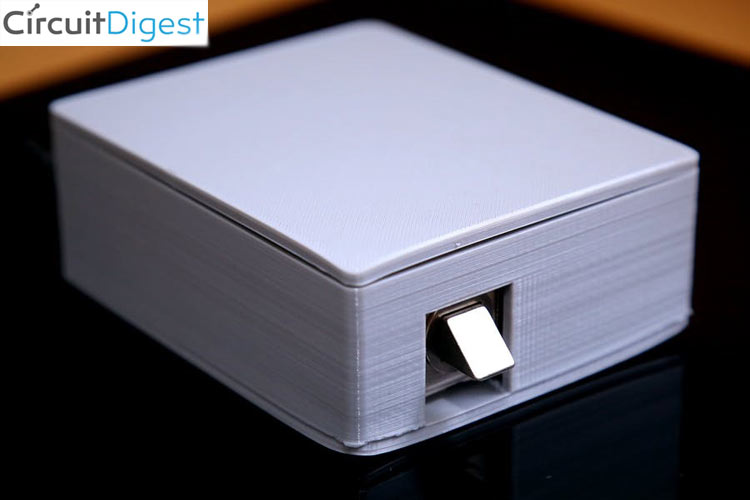
Thanks to technology, today's home security involve a wide range of software and hardware including web-based security services, biometrics, and personal devices with integrated security levels. One of the biggest advances of the digital-technical age has been the introduction of biometrics into security. Biometric door locks are now common with increased security levels and ensure the protection of our door locks. But there are two things that prevent the use of biometric locks. One is the cost of the lock which may start from $300. The other one is the lack of remote access. So let's add some IoT flavor to make the biometric door lock spicier.
What we are going to build?
So to ensure security and remote access we want to think of a new way to connect our door lock to our personal devices. Let's think about our mobile phones, they have the capability to control our smart door locks through MQTT and available protocols. Then why don't we add an additional biometric firewall to that? Yeah, that's what we are gonna do. Nowadays almost all mobile phones are equipped with fingerprint sensors. We use them to verify the biometrics of the authorized person. So it can overcome the disadvantages of now existing smart door locks with an increased security level. In essence, we are going to build a smart remote door lock with additional biometric security.
Also check our previous Smart Door Lock System,
- Digital Keypad Security Door Lock using Arduino
- Arduino Solenoid Door Lock using RFID
- Arduino RFID Door Lock
- ESP32-CAM Face Recognition Door Lock System
How we are going to build it?
As almost all smartphones are equipped with fingerprint sensors and we are using those sensors to verify identity. The data read from the fingerprint sensor is compared with the authentic fingerprints stored in the device using a mobile application and determines whether the person is authorized or not. The data after verification is sent from mobile to a suitable cloud database, from where the smart door lock system retrieves the data. If the person is authorized the smart door lock will unlock and if the person is not authorized it doesn't unlock.

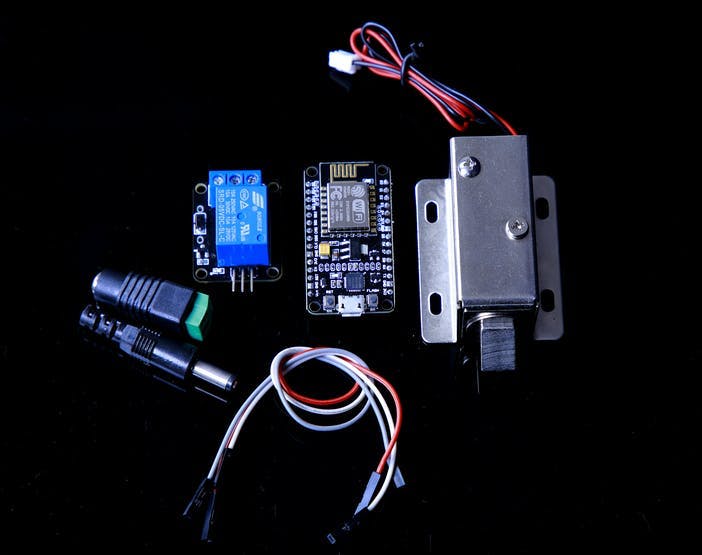
Project Used Hardware
- NodeMCU
- Electric Door Lock Module
- Relay
- 12v 1A Adapter
- Power Jack
- Connection Wires
Project Used Software
- Android Studio
- Firebase real-time database
- Embedded C/C++
- VS Code
Project Hardware Software Selection
Hardware Components
1. NodeMCU NodeMCU is an open-source IoT platform. It includes firmware that runs on the ESP8266 Wi-Fi SoC from Espressif Systems, and hardware that is based on the ESP-12 module. In this project, NodeMCU forms the brain of the smart door lock. The NodeMCU retrieves data from the cloud database and makes the relay ON/OFF according to the data.
2. The Electric Lock Module The electric door lock module operates at 12V which locks when the power is OFF and unlocks when the power is ON. It forms the physical part of the smart door lock.
3. The Relay A relay is a switching device as it works to isolate or change the state of an electric circuit from one state to another. The 12V supply is given to the electric lock module using the Relay according to the data given by the NodeMCU.
Software Components
1. The Mobile Application: A mobile application is used to scan the fingerprint and to verify the fingerprint and authorize the person. Once the fingerprint is verified the key for unlocking is posted to the firebase real-time database. Design the application as shown and code block to give it life. If you are not interested in building the app download it from here.
2. Firebase: Firebase is a mobile and web application development platform. Firebase frees developers to focus on crafting fantastic user experiences. You don’t need to manage servers. You don’t need to write APIs. Firebase is your server, your API, and your datastore, all written so generically that you can modify it to suit most needs. In our project, we use Firebase real-time database to instantly post and retrieve data so that there is no time delay.
3. NodeMCU - Code C: Now it's time to give life to the smart lock. The code for NodeMCU is developed in C and is admin/uploaded using Arduino IDE. Download the Firebase extension library for NodeMCU from here and add it in Arduino IDE. Download the code and replace Firebase URL and Firebase Auth with yours. Then admin/upload the code using Arduino IDE and verify the working.
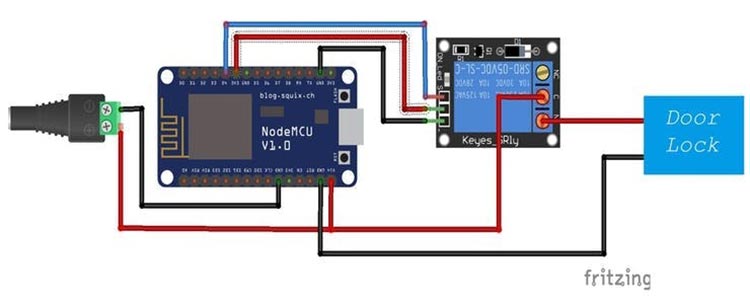
Circuit Diagram
Gather all the necessary components. Then solder them properly according to the given connection schema. I used a micro-soldering station to control the temperature to avoid damage to NodeMCU while soldering. Be careful not to damage the MCU while soldering as high temperatures may damage the ICs.
Complete Project Code
#include <ESP8266WiFi.h>                                                // esp8266 library

#include <FirebaseArduino.h>                                             // firebase library
#define FIREBASE_HOST "lock-xx.firebaseio.com"                         // the project name address from firebase id

#define FIREBASE_AUTH "TPYxoqP6NhxxxxxxxHhAkoSkjiJSHgprF2SxgzSH5"                    // the secret key generated from firebase

#define WIFI_SSID "a"                                          // input your home or public wifi name

#define WIFI_PASSWORD "password "  //password of wifi ssid

#define LOCK 2
String fireStatus = "";                                                     // led status received from firebase                                                              // for external led

void setup() {

  Serial.begin(9600);

  delay(1000);

  pinMode(LOCK, OUTPUT);

  WiFi.begin(WIFI_SSID, WIFI_PASSWORD);                                      //try to connect with wifi

  Serial.print("Connecting to ");

  Serial.print(WIFI_SSID);

  while (WiFi.status() != WL_CONNECTED) {

    Serial.print(".");

    delay(500);

  }

  Serial.println();

  Serial.print("Connected to ");

  Serial.println(WIFI_SSID);

  Serial.print("IP Address is : ");

  Serial.println(WiFi.localIP());                                                      //print local IP address

  Firebase.begin(FIREBASE_HOST, FIREBASE_AUTH);                                       // connect to firebase

}
void loop() {

  fireStatus = Firebase.getString("Status");                                      // get ld status input from firebase

  if (fireStatus == "\"UNLOCKED\"") {                                                          // compare the input of led status received from firebase

    Serial.println("Unlocking");                                                                          // make bultin led ON

    digitalWrite(LOCK, HIGH);                                                        // make external led ON

  }

  else if (fireStatus =="\"LOCKED\"") {                                                  // compare the input of led status received from firebase

    Serial.println("Locking");

    digitalWrite(LOCK, LOW);                                                         // make external led OFF

  }

  else {

    Serial.println("Wrong Credentials!");

  }

}


