Being in the field of electronic engineering, we wanted to explore and experiment with the different possibilities of working with several sensors and components. The idea of controlling mobile devices using simple hand gestures is very fascinating and useful. We also wanted to make a product that solves several problems, makes tasks easier and all-in-all be a useful tool for people.
What it does?
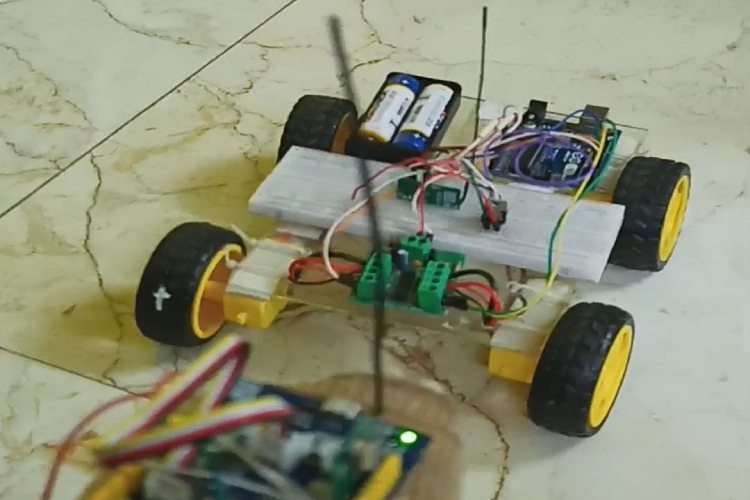
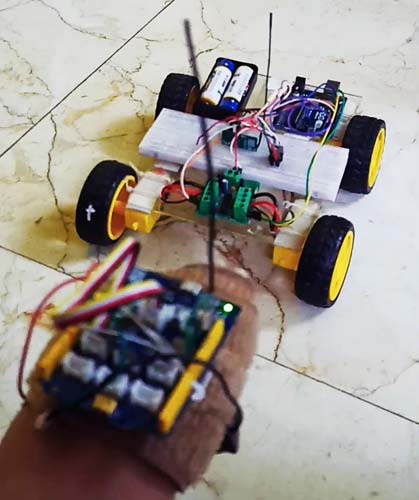
Pantomime is a configurable gesture controller unit that can be used for reliable human-machine interaction. For the demo purpose, we have shown a use case of the Pantomime in a chassis of 4WD, which here can be easily altered with a smart wheelchair. The Pantomime responds to the hand gestures to control the 4wd rover. The motions we were able to show using the prototype are forward, backward, left, right.
Previously, we built some gesture control project, you can check them out here,
- How to Use APDS9960 RGB and Gesture Sensor with Arduino
- Gesture Controlled Contactless Elevator using APDS9960 Sensor
- Gesture Controlled Video Player using Raspberry Pi and MediaPipe - Play, Pause and Control Volume using Gestures
- Accelerometer Based Hand Gesture Controlled Robot using Arduino
- Gesture based Intelligent Appliance Control Robot
- Control your Computer with Hand Gestures using Arduino
- Hand Gesture Controlled Robotic Arm using Arduino Nano
Challenges we ran into
Setting up the transmitter and receiver modules to send and receive the gesture commands was a bit tricky, there is a lag between the gesture made and the rover to perform the respective action, but later by modifying the code with some filters and adjusting the hardware circuitry as well, we got comparatively better results. We were also having some troubles with the 5v input port of the Arduino connected to the receiver that is on the rover, but we tackled that by moving the connections to the 5v port of the ICSP headers.
Component Required for Pantomime
Project Used Hardware
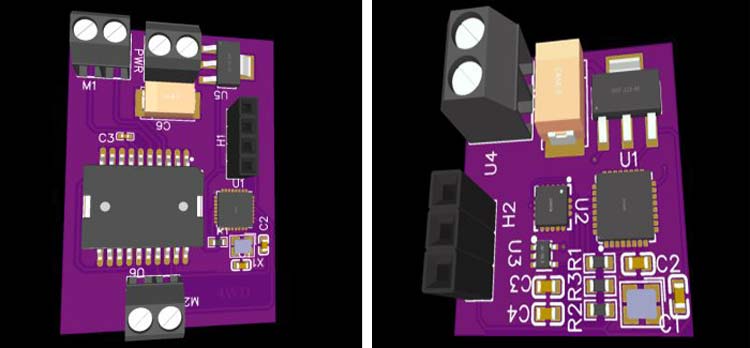
- AVR Microcontroller(atmega328p),
- RF Modules,
- LIS3DHT Accelerometer,
- L298 High Power Motor Driver,
- Passive complementary parts,
- Screw Terminals, PCB
Project Used Software
- ArduinoIDE,
- EasyEDA,
- Recursive Filters,
- RadioHead radio driver
Project Hardware Software Selection
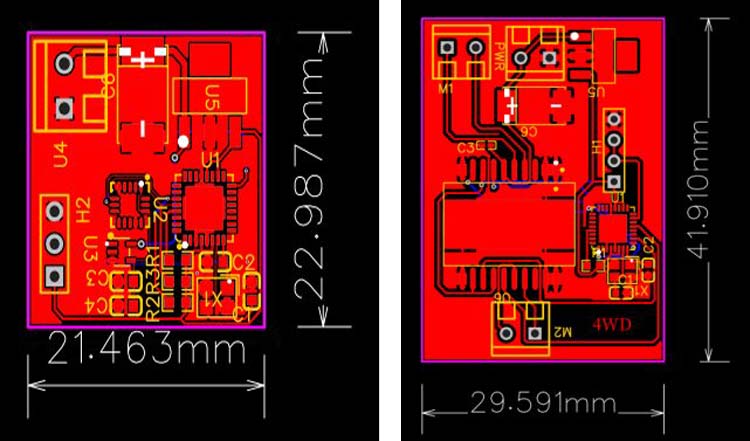
The prototype of the project was built using 4 300 RPM BO motors, 4 wheels, an L293d motor driver, a 433mHz RF (transmitter and receiver) modules to transmit and receive the gesture commands, and two Arduino Uno (one for the receiver i.e. on the rover, and the other for the transmitter circuitry) for communication and controlling purposes. Along with that, to power the rover, we used 2 3.7v Li-On batteries. The chassis was built using an acrylic board. Some basic Arduino coding was done to communicate between the transmitter and receiver with checksums. For the gesture identifying wearable, we interfaced the transmitter with a three-axis accelerometer to calculate the angle of inclination in each direction. And lastly to show the utility of the receiver we incorporated it in a 4WD rover. Since we need to design the PCBs, we used the EasyEDA PCB designer. To develop the firmware we used Arduino IDE.
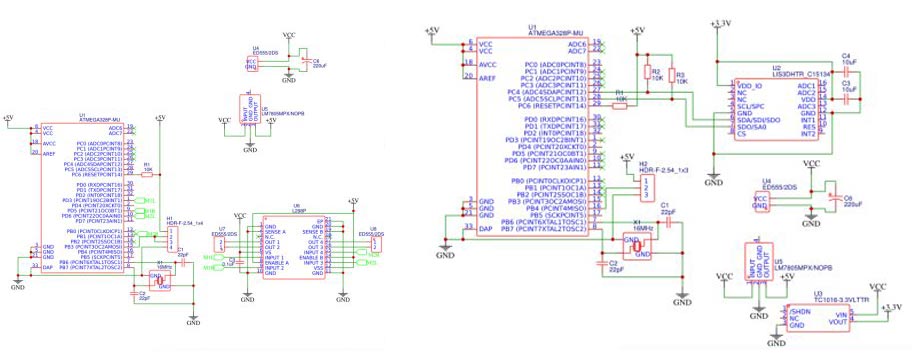
Gesture Controller Circuit Diagram
Two circuits were made one the transmitter, another is the Receiver the working principle remains the same as above mentioned.
Accomplishments
Accomplishments that we're proud of: Completing the project on time including the PCB design, getting the prototype to work, and overcoming the obstacles faced while building it were some of our greatest achievements.
What we learned?
We learned about RF communication and interfacing the modules with an accelerometer and a 4WD rover. We also learned about checksums, the eradication of errors, and haptic feedback.
What's next for Pantomime
Next, we would definitely try to make the interface much smoother and efficient. We would also like to make Pantomime market-ready and user-configurable. We are planning to test the same gesture controller on different mobile devices like drones in the future.
Complete Project Code
#include <RH_ASK.h>
#include <SPI.h>
#define base 200
#define R2 9
#define R1 6
#define L1 5
#define L2 3
RH_ASK driver;
void setup()
{
  pinMode (R1, OUTPUT);
  pinMode (R2, OUTPUT);
  pinMode (L1, OUTPUT);
  pinMode (L2, OUTPUT);
  Serial.begin(9600);
  if (!driver.init())
    Serial.println("init failed");
}
void loop()
{
  char buf[2];
  uint8_t buflen = 2;

  if (driver.recv(buf, &buflen))
  {
    if (buf[1] == 'f' && buf[0] == 's')
      forward();

    else if (buf[1] == 'b' && buf[0] == 's')
      back();

    else if (buf[1] == 's' && buf[0] == 's')
      stop();

    else if (buf[1] == 's' && buf[0] == 'l')
      left();

    else if (buf[1] == 's' && buf[0] == 'r')
      right();

    else
    stop();

   /* else if (buf[0] == 'l' && buf[1] == 'f')
    {
      left();
      delay(100);
      forward();
      delay(100);
    }

    else if (buf[0] == 'r' && buf[1] == 'f')
    {
      right();
      delay(100);
      forward();
      delay(100);
    }

    else if (buf[0] == 'l' && buf[1] == 'b')
    {
      left();
      delay(100);
      back();
      delay(100);
    }

    else if (buf[0] == 'r' && buf[1] == 'b')
    {
      right();
      delay(100);
      back();
      delay(100);
    }*/
    Serial.println(String(buf));
  }
}

void forward()
{ analogWrite (L1, base);
  digitalWrite (L2, LOW);
  digitalWrite (R2, LOW);
  analogWrite(R1, base);
}

void back()
{ analogWrite (L2, base);
  digitalWrite (L1, LOW);
  digitalWrite (R1, LOW);
  analogWrite(R2, base);
}

void right()
{ analogWrite (L1, base);
  digitalWrite (L2, LOW);
  analogWrite (R2, base);
  digitalWrite (R1, LOW);
}

void left()
{
  digitalWrite (L1, LOW);
  analogWrite (L2, base);
  digitalWrite (R2, LOW);
  analogWrite (R1, base);
}

void stop()
{
  analogWrite (L1, 255);
  analogWrite (L2, 255);
  analogWrite (R2, 255);
  analogWrite (R1, 255);
}
--------------------------------------------------------------------------------------------------------------------------------------------

#include "LIS3DHTR.h"
#include <Wire.h>
LIS3DHTR<TwoWire> LIS;

#include <RH_ASK.h>
#include <SPI.h>

#define WIRE Wire
RH_ASK driver;

void setup() {

  pinMode(13,OUTPUT);
  digitalWrite(13, HIGH);
  Serial.begin(115200);
  while (!Serial) {};
  LIS.begin(WIRE, 0x19);

  delay(100);
  LIS.setOutputDataRate(LIS3DHTR_DATARATE_50HZ);
  LIS.setHighSolution(true);

  if (!driver.init())
         Serial.println("init failed");
}

float x = 0, y = 0;
char t = 's';

char buf[2];

void loop() {
  x = 0.1 * LIS.getAccelerationX() + 0.9 * x;
  y = 0.1 * LIS.getAccelerationY() + 0.9 * y;
  if (x*10 < -3)
    buf[0] = 'l';

  else if (x*10 > 3)
    buf[0] = 'r';

  else
    buf[0] = 's';
  if (y*10 > 3)
    buf[1] = 'f';

  else if (y*10 < -3)
    buf[1] = 'b';

  else
    buf[1] = 's';

  driver.send((uint8_t *)buf, 2);
  driver.waitPacketSent();

  Serial.print(x);
  Serial.print("  ");
  Serial.println(y);

}

