One common feature that is used in almost every embedded application is the ADC module (Analog to Digital Converter). These Analog to digital Converters can read voltage from analog sensors like Temperature sensor, Tilt sensor, Current sensor, Flex sensor etc. In this tutorial we will learn What is ADC and How to use ADC in Atmega16. This tutorial includes connecting a small potentiometer to ADC pin of Atmega16 and 8 LED’s are used to display the changing voltage of ADC output value with respect to change in ADC input value.
Previously we explained ADC in other microcontrollers:
- How to use ADC in ARM7 LPC2148 - Measuring Analog Voltage
- How to use ADC in STM32F103C8 - Measuring Analog Voltage
- How to use ADC in MSP430G2 - Measuring Analog Voltage
- How to Use ADC in Arduino Uno?
- Using ADC Module of PIC Microcontroller with MPLAB and XC8
What is ADC (Analog to Digital Conversion)
ADC stands for Analog to Digital Converter. In electronics, an ADC is a device which converts an analog signal like current and voltage into digital code (binary form). In real world most of the signals are analog and any microcontroller or microprocessor understands the binary or digital language (0 or 1). So, in order to make microcontrollers understand the analog signals, we have to convert these analog signals into digital form. ADC exactly does this for us. There are many types of ADC available for different applications. Few popular ADC’s are flash, successive approximation and sigma-delta.
The most inexpensive type of ADC is Successive-Approximation and in this tutorial Successive-approximation ADC will be used. In a Successive-Approximation type of ADC, a series of digital codes, each corresponds to a fix analog level, are generated successively. An internal counter is used to compare with the analog signal under conversion. The generation is stopped when the analog level becomes just larger than the analog signal. The digital code corresponds to the analog level is the desired digital representation of the analog signal. This finishes our little explanation on successive-approximation.
If you want to explore the ADC in much deep then you can refer our previous tutorial on ADC. ADC’s are available in form of IC’s and also microcontrollers comes with inbuilt ADC nowadays. In this tutorial we will use inbuilt ADC of Atmega16. Let’s discuss about the inbuilt ADC of Atmega16.
ADC in AVR Microcontroller Atmega16
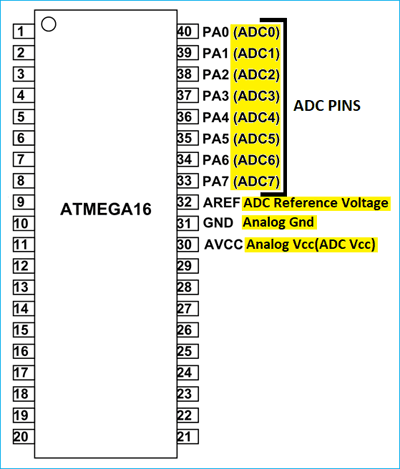
Atmega16 has an inbuilt 10 bit and 8-channel ADC. 10 bit corresponds to that if input voltage is 0-5V then it will be split in 10 bit value i.e. 1024 levels of discrete Analog values (210 = 1024). Now 8-channel corresponds to the dedicated 8 ADC Pins on Atmega16 where each pin can read the Analog voltage. Complete PortA (GPIO33-GPIO40) is dedicated for ADC operation. By default, the PORTA pins are general IO pins, it means the port pins are multiplexed. In order to use these pins as ADC pins we will have to configure certain registers dedicated to ADC control. This is why the registers are known as ADC control registers. Let us discuss how to setup these registers to start functioning the inbuilt ADC.
ADC Pins in Atmega16

Components Required
- Atmega16 Microcontroller IC
- 16Mhz Crystal Oscillator
- Two 100nF Capacitors
- Two 22pF Capacitors
- Push Button
- Jumper Wires
- Breadboard
- USBASP v2.0
- Led(Any Color)
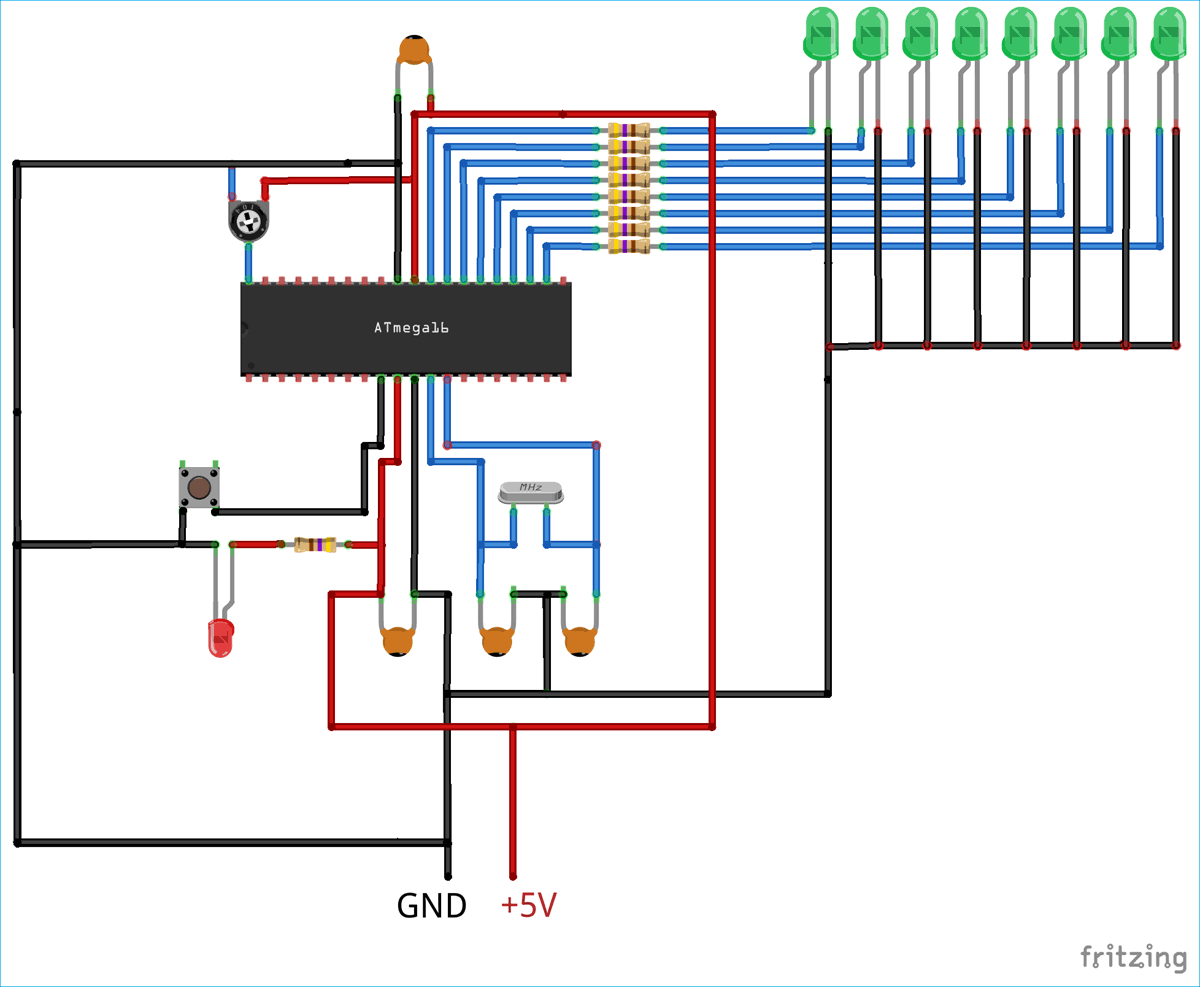
Circuit Diagram

Setting up ADC control Registers in Atmega16
1. ADMUX Register(ADC Multiplexer Selection Register):
The ADMUX Register is for selection of ADC channel and selecting reference voltage. The below picture shows the overview of ADMUX register. The description is explained below.

- Bit 0-4: channel selection bits.
|
MUX4 |
MUX3 |
MUX2 |
MUX1 |
MUX0 |
ADC Channel Selected |
|
0 |
0 |
0 |
0 |
0 |
ADC0 |
|
0 |
0 |
0 |
0 |
1 |
ADC1 |
|
0 |
0 |
0 |
1 |
0 |
ADC2 |
|
0 |
0 |
0 |
1 |
1 |
ADC3 |
|
0 |
0 |
1 |
0 |
0 |
ADC4 |
|
0 |
0 |
1 |
0 |
1 |
ADC5 |
|
0 |
0 |
1 |
1 |
0 |
ADC6 |
|
0 |
0 |
1 |
1 |
1 |
ADC7 |
- Bit-5: It is used to adjust the result to right or left.
|
ADLAR |
Description |
|
0 |
Right adjust the result |
|
1 |
Left adjust the result |
- Bit 6-7: They are used to select the reference voltage for ADC.
|
REFS1 |
REFS0 |
Voltage Reference Selection |
|
0 |
0 |
AREF, Internal Vref turned off |
|
0 |
1 |
AVcc with external capacitor at AREF pin |
|
1 |
0 |
Reserved |
|
1 |
1 |
Internal 2.56 Voltage Reference with external capacitor at AREF Pin |
Now start configuring these register bits in program such that we get Internal ADC read and output to All Pins of PORTC.
Programming Atmega16 for ADC
Complete program is given below. Burn the program in Atmega16 using JTAG and Atmel studio and rotate the potentiometer to vary the ADC value. Here, the code is explained line by line.
Start with making one function to read ADC converted value. Then pass channel value as ‘chnl’ in ADC_read function.
unsigned int ADC_read(unsigned char chnl)
Channel values must be between 0 to 7 as we have only 8 ADC channels.
chnl= chnl & 0b00000111;
By writing ‘40’ i.e ‘01000000’ to ADMUX register we selected PORTA0 as ADC0 where the Analog input will be connected for digital conversion.
ADMUX = 0x40;
Now this step involves ADC conversion process, where by writing ONE to ADSC Bit in ADCSRA register we start conversion. After that, wait for ADIF bit to return value when conversion is complete. We stop conversion by writing ‘1’ at ADIF Bit in ADCSRA register. When the conversion is complete then return ADC value.
ADCSRA|=(1<<ADSC);
while(!(ADCSRA & (1<<ADIF)));
ADCSRA|=(1<<ADIF);
return (ADC);
Here the internal ADC reference voltage is selected by setting REFS0 bit. After that enable ADC and select prescaler as 128.
ADMUX=(1<<REFS0);
ADCSRA=(1<<ADEN)|(1<<ADPS2)|(1<<ADPS1)|(1<<ADPS0);
Now save ADC value and send it to PORTC. In PORTC, 8 LED’s are connected which will show the digital output in 8 bit format. The example we have shown varies the voltage between 0V to 5V using one 1K pot.
i = ADC_read(0);
PORTC = i;

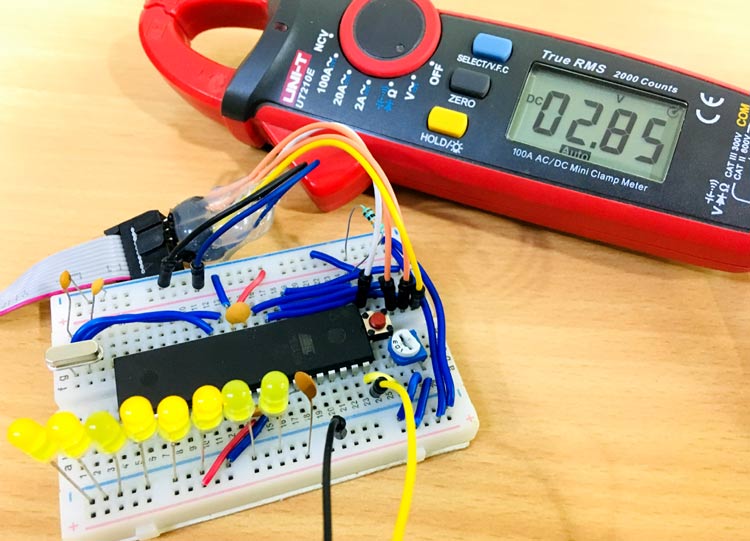
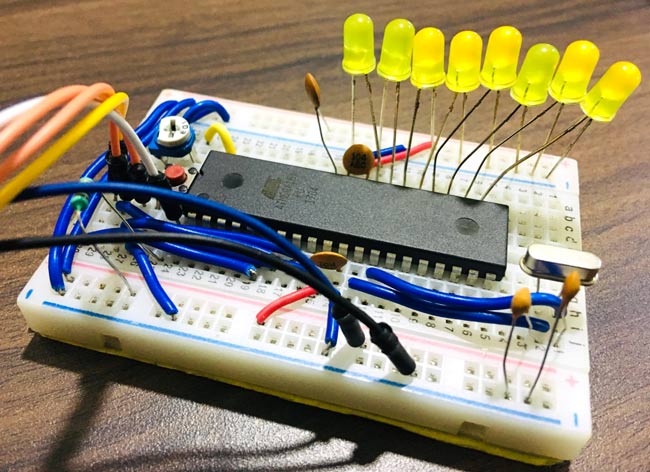
Digital Multimeter is used to display analog input voltage in ADC Pin and 8 LED’s are used to show corresponding 8 Bit value of ADC output. Just rotate the Potentiometer and see the corresponding result on multimeter as well as on glowing LEDs.
Complete code and working video is given below.
Complete Project Code
#include <avr/io.h>

unsigned int ADC_read(unsigned char chnl)
{
chnl= chnl & 0b00000111; // select adc channel between 0 to 7
ADMUX = 0x40;        //channel A0 selected
ADCSRA|=(1<<ADSC);   // start conversion
while(!(ADCSRA & (1<<ADIF)));   // wait for ADIF conversion complete return
ADCSRA|=(1<<ADIF);   // clear ADIF when conversion complete by writing 1
return (ADC); //return calculated ADC value
}

int main(void)
{
PORTC = 0xFF;         //make PORTC as output to connect 8 leds
ADMUX=(1<<REFS0);      // Selecting internal reference voltage
ADCSRA=(1<<ADEN)|(1<<ADPS2)|(1<<ADPS1)|(1<<ADPS0);     // Enable ADC also set Prescaler as 128

int i = 0; // define an integer to save adc read value

    while (1)
    {

  i = ADC_read(0);   //save adc read value in integer
          PORTC = i;        // send adc value to all pins of portc
    }
}


