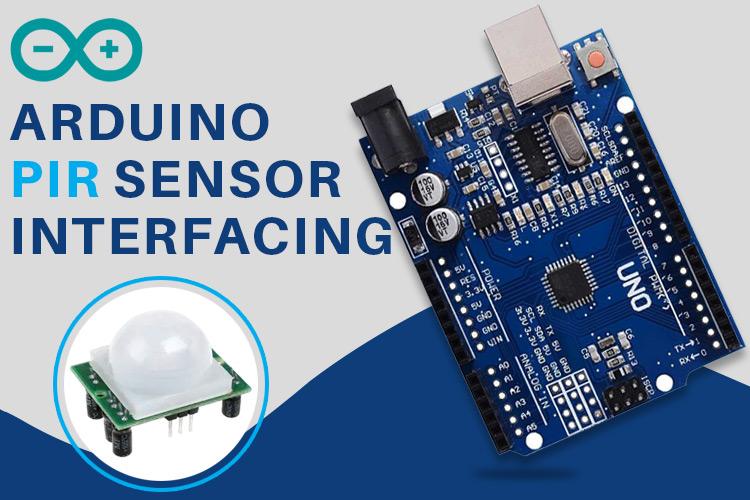
In this blog, we will learn about how to interface a Passive Infrared sensor (PIR Sensor) or motion sensor with an Arduino. We will also learn about how this sensor works and different parts of it. So for more info, stay tuned.
The Components Used in this project are:-
- Arduino Uno
- PIR Motion Sensor
- Jumper Wires
HC-SR501 PIR Motion Sensor Pinout
The PIR motion sensor consists of 3 pins-VCC, GND, and the Data Output Pin.
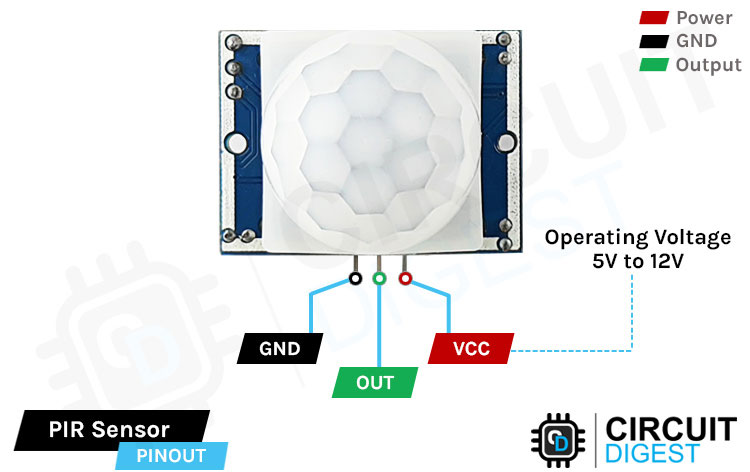
VCC is the power pin of the module.
Out is the data Output pin of the module.it goes high when motion is detected.
GND is the GND pin of the module.
PIR Sensor Module Parts
The topmost part of the PIR sensor consists of a lens with concentric grooves carved into the plastic. These are called Fresnel lens.
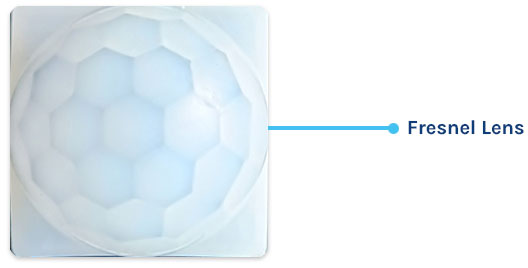
The contours on this plastic helps in gathering parallel light rays at a focal point, each one of them acting as individual refracting surfaces. These surfaces increase the range and field of view of PIR sensor, the lens is divided into several sections, each of them being a separate Fresnel lens.
When you separate the Fresnel lens from the main module. You will see the front side of the circuit which will look like this.
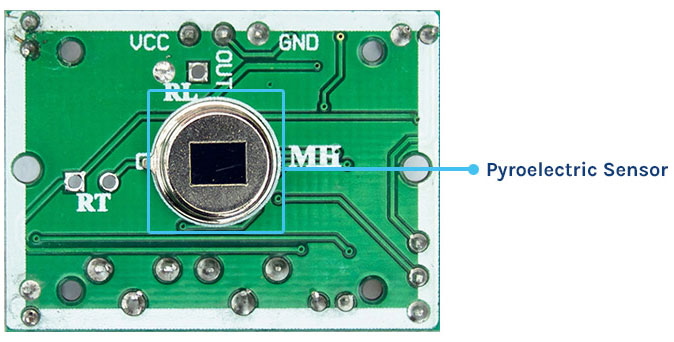
In the center of the sensor module, you have the main pyroelectric sensor that allows IR rays to pass through and blog any other radiation. The sensor can cancel out ambient radiation and detect changes in radiation patterns.
If we turn this sensor module around, it will look something like this.
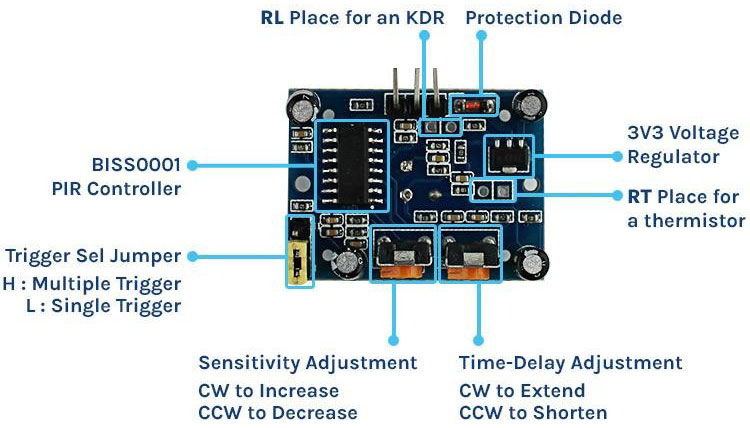
The backside of the PIR sensor module consists of
- BISS0001 PIR Controller
- Trigger Selection Jumper
- Sensitivity Adjustment Potentiometer
- Time-delay adjustment potentiometer
- RT and RL(thermistor and LDR) solder pads
- 3.3V Voltage regulator
- Protection diode
- BISS0001 PIR Controller: The BISS0001 is an integral part of the module, serving as the primary controller. Its purpose is to process signals generated by the PIR sensor element and manage the sensor's overall functionality. This controller handles tasks such as amplifying the sensor signal, signal conditioning, and triggering other elements, including the time-delay adjustment circuit.
- Trigger Selection Jumper: This jumper or switch allows you to configure the sensor's operating mode. It has two distinct modes:
a. Single Trigger Mode: In this mode, the sensor will trigger only once for each detected motion event. It will not trigger again until the output pin is externally reset. This mode is suitable when you want one trigger per motion event, irrespective of the continued presence of motion.
b. Repeatable Trigger Mode: When set to this mode, the sensor will repeatedly trigger as long as it detects motion within its sensing range. It does not require an external reset and will continue to output a trigger signal as long as motion is detected. This mode is useful when continuous monitoring or tracking of motion is required.
- Sensitivity Adjustment Potentiometer: This potentiometer is designed to fine-tune the sensitivity of the PIR sensor. By rotating this knob, you can increase or decrease the sensor's sensitivity level. Increasing sensitivity extends the detection range, allowing the sensor to detect motion from a greater distance, while decreasing sensitivity narrows the range.
- Time-delay Adjustment Potentiometer: This potentiometer enables you to adjust the time delay or the duration for which the sensor's output remains high (indicating motion) after detecting movement. By adjusting this knob, you can set the time delay to be either short or long, depending on your specific application needs. A shorter delay is suitable for applications where brief motion events are relevant, while a longer delay is useful for scenarios requiring prolonged detection.
- RT and RL (Thermistor and LDR) Solder Pads: These solder pads provide the option to connect additional components like thermistors (RT) and light-dependent resistors (LDR) to the sensor module. Integrating these components can enhance the sensor's functionality by adding temperature or light sensitivity, allowing it to respond differently under various environmental conditions.
- 3.3V Voltage Regulator: This component acts as a voltage regulator, supplying a stable 3.3V power source to the PIR sensor module. It ensures that the module operates within its specified voltage range, promoting consistent and reliable performance.
- Protection Diode: The protection diode safeguards the PIR sensor module from damage caused by reverse voltage. It permits current flow in only one direction, offering protection against accidental reverse polarity connections or voltage spikes.
How does a PIR sensor work?
Every object with a temperature above absolute zero emits IR radiation, which is invisible to the human eye but carries information about an object's temperature and movement.
The operation of the HC-SR501 PIR Sensor unfolds in several stages. Upon powering up, the sensor initiates an initialization phase during which it calibrates itself to the ambient IR radiation conditions. This calibration helps the sensor adapt to the background temperature and minimize false triggers.
Subsequently, the sensor continuously monitors its surroundings, comparing the detected IR radiation pattern with the previously calibrated background. When a warm object, such as a human or a pet, moves within the sensor's field of view, it causes a dynamic alteration in the IR radiation pattern received by the pyroelectric sensor. This change is promptly detected by the sensor.
The sensor's internal circuitry processes the signal output from the pyroelectric sensor. It includes signal amplification and filtering mechanisms to ensure accurate and reliable motion detection. The final output from the HC-SR501 PIR Sensor is typically a digital signal. This signal remains in a low state when no motion is detected. However, when motion occurs within the sensor's sensing range, the signal transitions to a high state. The duration for which the signal stays high is determined by the time-delay adjustment potentiometer on the sensor. After this preset time, the signal returns to its low state, indicating the absence of motion.
Commonly Asked Questions about PIR Sensor
What is the detection range of a PIR sensor?
The detection range of a PIR sensor varies, but it's typically between 5 to 15 feet (1.5 to 4.5 meters), depending on the sensor's specifications.
How can I reduce false alarms with a PIR sensor?
To minimize false alarms, avoid placing the sensor near sources of heat or direct sunlight. Adjust the sensitivity and time delay settings as needed and use a lens to narrow the field of view.``
Can PIR sensors detect through walls?
No, PIR sensors cannot detect motion through walls. They are designed to detect motion within their line of sight and are affected by physical barriers like walls.
Arduino PIR Motion Sensor Interfacing Circuit Diagram
Connect the PIR sensor's VCC (or +) pin to the Arduino's 5V output.
Connect the GND (-) pin of the PIR sensor to any GND pin on the Arduino.
Attach the OUT (or signal) pin of the PIR sensor module to a digital input pin on the Arduino (e.g., pin 5).
Code explanation of the Arduino PIR Interfacing
The code explanation of the code is as follows. The complete code can be found at the absolute bottom of the blog.
const int pirPin = 5;
This line defines a constant integer variable named pirPin and assigns it the value 5. It represents the digital pin on the Arduino to which the PIR sensor is connected. In this example, the PIR sensor is connected to digital pin 5
void setup() {
This line marks the beginning of the setup() function, which is a special function in Arduino that is executed once when the program starts. It is used for initialization tasks.
pinMode(pirPin, INPUT);
This line configures the pirPin (which is connected to the PIR sensor) as an input pin. This setting tells the Arduino that we will read data from this pin, specifically the state of the PIR sensor (HIGH or LOW).
  Serial.begin(9600);
delay(20000);
}
This line initializes the serial communication at a baud rate of 9600 bits per second. Serial communication is used here for debugging purposes. You can view the messages sent by the Arduino on the serial monitor in the Arduino IDE. Also, a delay of 20000 milliseconds is given for the PIR sensor to warm up.
void loop() {
This line marks the beginning of the loop() function. The loop() function is a core part of an Arduino sketch and runs repeatedly after the setup() function. It contains the code that will be executed continuously.
int pirState = digitalRead(pirPin);
This line declares an integer variable pirState and assigns it the value read from the pirPin using the digitalRead() function. It reads the state of the PIR sensor, which can be either HIGH (motion detected) or LOW (no motion).
if (pirState == HIGH) {
This line starts an if statement that checks whether pirState is equal to HIGH. If the PIR sensor detects motion (HIGH state), the code inside the following block will execute.
Serial.println("Motion detected!");
This line sends the text "Motion detected!" to the serial monitor if the PIR sensor detects motion. This is for debugging and can be viewed on the serial monitor.
delay(1000);
This line adds a delay of 1000 milliseconds (1 second) to the program. It's used to prevent continuous motion detection messages and allows time for the motion to stabilize. You can adjust the delay duration as needed.
  } else {
Serial.println("No motion detected.");
 }
}
This line starts the else block, which will execute if the pirState is not HIGH (i.e., no motion is detected).
It will send the text "No motion detected." to the serial monitor if the PIR sensor does not detect motion.
Working Demonstration
The Output of the complete project will look like this. The output of the PIR sensor can also be seen on serial monitor.
Projects using PIR sensor
This blog provides a step-by-step guide on creating a practical and cost-effective dog barking security alarm system using Arduino, PIR sensors, and a dog barking sound module. Whether you're a DIY enthusiast or seeking an innovative home security solution, this blog offers valuable insights to help you protect your property with the help of technology and your faithful companion, your dog.
This blog offers a comprehensive tutorial on building a motion detector system using the MSP430 Launchpad and a PIR (Passive Infrared) sensor. It provides valuable insights for electronics enthusiasts and beginners alike, guiding them through the process of creating a reliable motion detection solution with detailed step-by-step instructions and code examples.
This blog introduces an IoT-based security system that utilizes the ESP8266 Wi-Fi module. It guides readers through the construction of a smart security solution with the ability to send voice messages, making it an ideal resource for those interested in enhancing home or office security using Internet of Things (IoT) technology.
Complete Project Code
const int pirPin = 5;  // Digital pin connected to the PIR sensor
void setup() {
  pinMode(pirPin, INPUT);   // Set PIR sensor pin as input
  Serial.begin(9600);      // Initialize serial communication for debugging (optional)
  delay(20000);
}
void loop() {
  int pirState = digitalRead(pirPin); // Read PIR sensor state (HIGH or LOW)
  if (pirState == HIGH) {
    // Motion detected
    Serial.println("Motion detected!");
    delay(1000); // Delay for 1 second (adjust as needed)
  } else {
    // No motion
    Serial.println("No motion detected.");
  }
}


