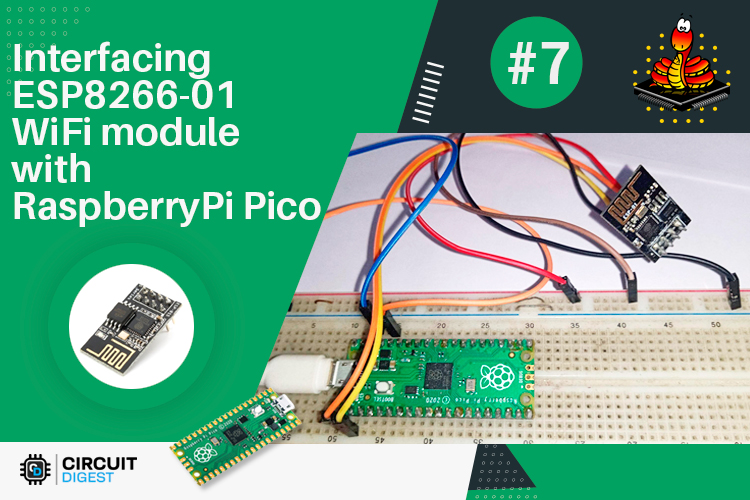
We know that ESP-01 is the best and cheaper module available in the market. As the title suggest, in this tutorial, we are going to interface a separate Wi-Fi module with the Raspberry Pi Pico. We will learn how to connect and program the ESP01 module with Raspberry Pi Pico using Micropython and ESP8266 library.
The ESP8266-01 module comes with default firmware loaded, which we can access through UART by sending the AT command sets. Using the Micropython ESP8266 we can easily interface ESP8266 with Raspberry Pi Pico and complete the http get/post operation.
Components Requires to Make a Connection between ESP8266 and Raspberry Pi Pico
- Raspberry pi Pico
- ESP8266-01 Module
- Bread Board
- Jumper wires
- 1k or 10k resistor (optional connect between 3.3v and ESP8266 EN pin)
Connection Diagram of the ESP8266-01 Module with the Raspberry Pi Pico
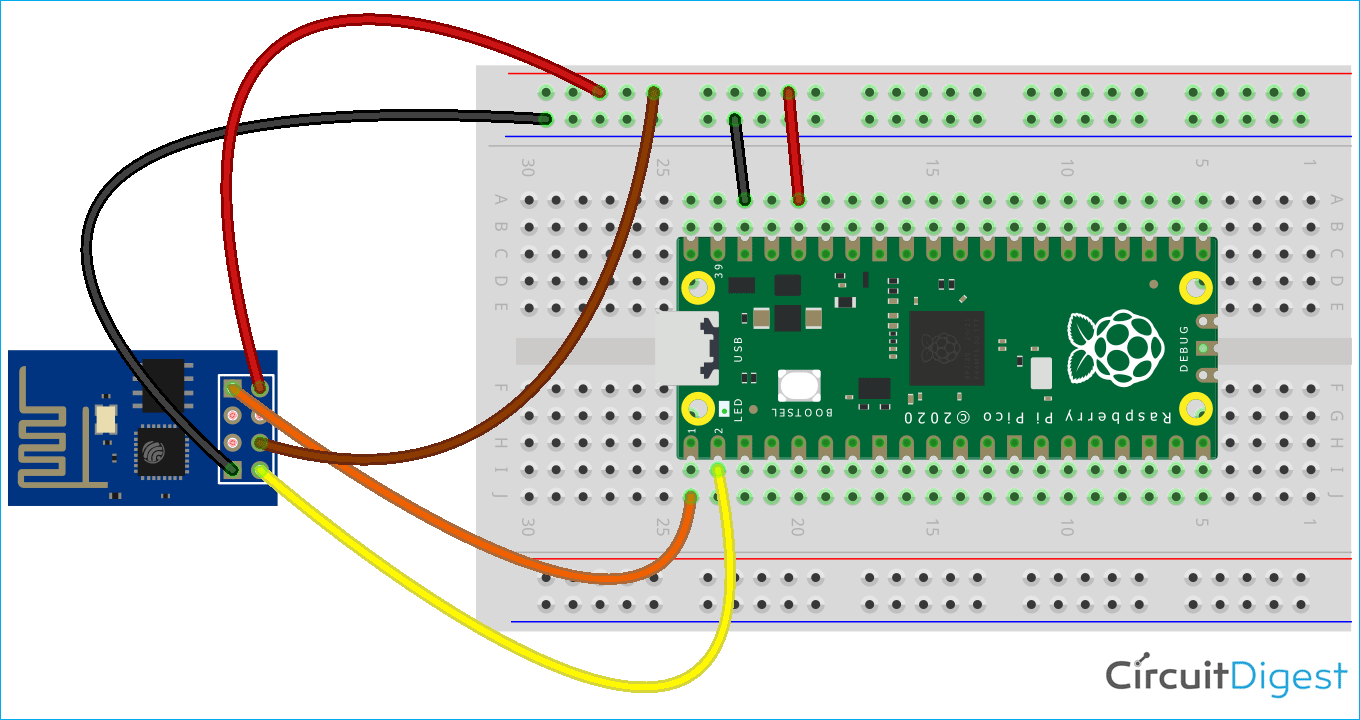
You can refer the circuit diagram below for the raspberrry pi pico and esp8266-01 module. The red wires are used to connect the VCC pin of the ESP-01 module with the 3.3V pin that is Pin number 36 of the Pico board. The Brown wire is used to provide the 3.3V to the Channel Enable pin that is “CH_EN” of the ESP-01 Module. The transmitter pin of the ESP-01 module is connected to the Receiver pin of the UART0 Channel that is Pin number 2 of the Pico board by using the Yellow Wire in the below circuit diagram. The Receiver pin of the ESP-01 module is connected to the Transmitter pin of UART0 channel that is pin number 1 of the Pico board with the orange wire. All the ground of the board devices is connected with the black wires.
Program to Establish the Connection in between the ESP8266 and the Raspberry Pi Pico
Before getting started with the code, you need to download the complete code files from our GitHub Repository of the Raspberry Pi Pico Tutorial Series or you can refer to the Raspberry Pi Pico MicroPython ESP8266 library to do the following HTTP Get/Post Operation.
For HTTP Get operation, we are using www.httpbin.org/ip web link to get ESP8266’s IP address.
{
  "origin": "223.229.136.70"
}
For HTTP Post operation we are using www.httpbin.org/post web link to get Post response with other data types in Json format. Example:
{
  "args": {},
  "data": "{\"name\":\"Noyel\"}",
  "files": {},
  "form": {},
  "headers": {
    "Content-Length": "16",
    "Content-Type": "application/json",
    "Host": "httpbin.org",
    "User-Agent": "RPi-Pico",
  },
  "json": {
    "name": "Noyel"
  },
  "origin": "223.229.136.70",
  "url": "http://httpbin.org/post"
}
Now, let's start coding. The libraries mentioned below are needed to import before starting the main code then create an esp01 object by calling the ESP8266() function as shown in the below code snippet. This needs to complete the HTTP process.
from machine import UART, Pin
import time
from esp8266 import ESP8266
esp01 = ESP8266()
esp8266_at_ver = None
Next, call the esp01.startUP() function to check the connection between RaspberryPi Pico and ESP8266.
After calling esp01.startUP() then call esp01.echoING() to stop the AT command Echo and then call esp01.setCurrentWiFiMode() to set WiFi mode in STA+SoftAP. After configuring the WiFi mode, lets connect the WiFi by calling the esp01.connectWiFi("ssid","pwd") and wait until it connects.
print("StartUP",esp01.startUP())
#print("ReStart",esp01.reStart())
print("StartUP",esp01.startUP())
print("Echo-Off",esp01.echoING())
print("\r\n\r\n")
'''
Print ESP8266 AT command version and SDK details
'''
esp8266_at_var = esp01.getVersion()
if(esp8266_at_var != None):
    print(esp8266_at_var)
'''
set the current WiFi in SoftAP+STA
'''
esp01.setCurrentWiFiMode()
#apList = esp01.getAvailableAPs()
#for items in apList:
#    print(items)
    #for item in tuple(items):
    #    print(item)
print("\r\n\r\n")
'''
Connect with the WiFi
'''
print("Try to connect with the WiFi..")
while (1):
    if "WIFI CONNECTED" in esp01.connectWiFi("ssid","pwd"):
        print("ESP8266 connect with the WiFi..")
        break;
    else:
        print(".")
        time.sleep(2)
After calling these functions, the process waits for WiFi connection and after connection gets established the process goes further to complete the HTTP Get/Post operation and it continuously does Get/Post.
To complete the Get/Post operation, we need to call the esp01.doHttpGet() and the esp01.doHttpPost() function. In the esp01.doHttpGet() function, we need to pass Host-URL, then URL path, User-Agent[Optional, default “RPi-Pico”] and port number[optional, default “80”].
In the esp01.doHttpPost() function we need to pass Host-URL, the URL path, User-Agent[Optional, default “RPi-Pico”], content-type [ ex. application/json, text/plain etc], content, and port number[optional, default “80”].
After completing each Get/Post operation the function returns HTTP Error Code with Response and in this tutorial HTTP error code and response print on the serial out.
print("\r\n\r\n")
print("Now it's time to start HTTP Get/Post Operation.......\r\n")
while(1):
    led.toggle()
    time.sleep(1)
    '''
    Going to do HTTP Get Operation with www.httpbin.org/ip, It return the IP address of the connected device
    '''
    httpCode, httpRes = esp01.doHttpGet("www.httpbin.org","/ip","RaspberryPi-Pico", port=80)
    print("------------- www.httpbin.org/ip Get Operation Result -----------------------")
    print("HTTP Code:",httpCode)
    print("HTTP Response:",httpRes)
    print("-----------------------------------------------------------------------------\r\n\r\n")
    '''
    Going to do HTTP Post Operation with www.httpbin.org/post
    '''
    post_json="abcdefghijklmnopqrstuvwxyz"  #"{\"name\":\"Noyel\"}"
    httpCode, httpRes = esp01.doHttpPost("www.httpbin.org","/post","RPi-Pico", "application/json",post_json,port=80)
    print("------------- www.httpbin.org/post Post Operation Result -----------------------")
    print("HTTP Code:",httpCode)
    print("HTTP Response:",httpRes)
    print("--------------------------------------------------------------------------------\r\n\r\n")
    #break
Testing and Debugging the Communication Process
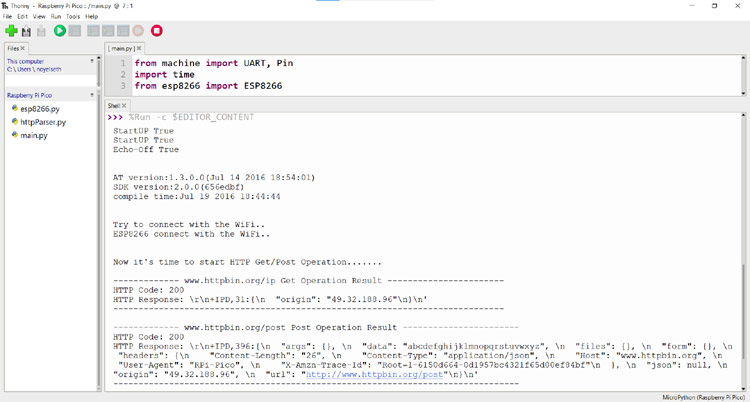
Once the circuit and code were complete, we tested the circuit with help of serial out debug data from the code. As you can see, we use the Thonny shell screen to check the serial out data.

Complete Project Code
from machine import UART, Pin
import time
from esp8266 import ESP8266
esp01 = ESP8266()
esp8266_at_ver = None
led=Pin(25,Pin.OUT)
print("StartUP",esp01.startUP())
#print("ReStart",esp01.reStart())
print("StartUP",esp01.startUP())
print("Echo-Off",esp01.echoING())
print("\r\n\r\n")
'''
Print ESP8266 AT command version and SDK details
'''
esp8266_at_var = esp01.getVersion()
if(esp8266_at_var != None):
    print(esp8266_at_var)
'''
set the current WiFi in SoftAP+STA
'''
esp01.setCurrentWiFiMode()
#apList = esp01.getAvailableAPs()
#for items in apList:
#    print(items)
    #for item in tuple(items):
    #    print(item)
print("\r\n\r\n")
'''
Connect with the WiFi
'''
print("Try to connect with the WiFi..")
while (1):
    if "WIFI CONNECTED" in esp01.connectWiFi("ssid","pwd"):
        print("ESP8266 connect with the WiFi..")
        break;
    else:
        print(".")
        time.sleep(2)
print("\r\n\r\n")
print("Now it's time to start HTTP Get/Post Operation.......\r\n")
while(1):
    led.toggle()
    time.sleep(1)
    '''
    Going to do HTTP Get Operation with www.httpbin.org/ip, It return the IP address of the connected device
    '''
    httpCode, httpRes = esp01.doHttpGet("www.httpbin.org","/ip","RaspberryPi-Pico", port=80)
    print("------------- www.httpbin.org/ip Get Operation Result -----------------------")
    print("HTTP Code:",httpCode)
    print("HTTP Response:",httpRes)
    print("-----------------------------------------------------------------------------\r\n\r\n")
    '''
    Going to do HTTP Post Operation with www.httpbin.org/post
    '''
    post_json="abcdefghijklmnopqrstuvwxyz"  #"{\"name\":\"Noyel\"}"
    httpCode, httpRes = esp01.doHttpPost("www.httpbin.org","/post","RPi-Pico", "application/json",post_json,port=80)
    print("------------- www.httpbin.org/post Post Operation Result -----------------------")
    print("HTTP Code:",httpCode)
    print("HTTP Response:",httpRes)
    print("--------------------------------------------------------------------------------\r\n\r\n")
    #break


