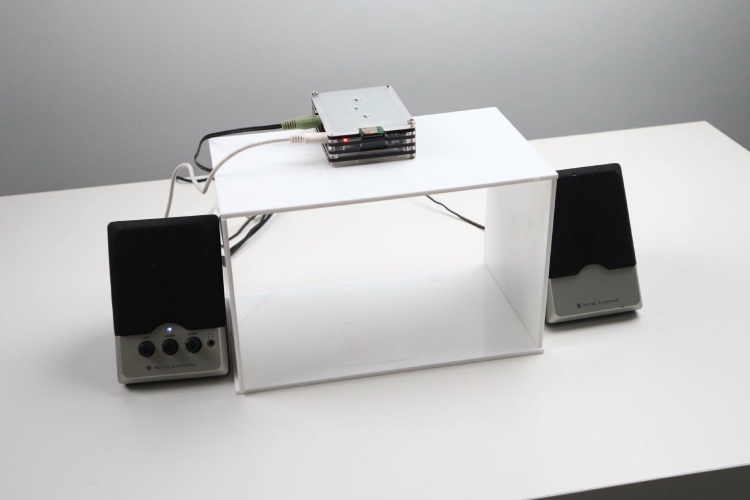
In our lively campuses, learning thrives so does waste. Sorting waste right where it's tossed out—like papers, plastics, food scraps—becomes crucial for a greener campus. It's not just about us; it's about teaching responsible habits to students and staff and making a mark on the world.
When we sort waste where we throw it, everything gets simpler. No need for big sorting centers—each of us gets a say in what happens to our waste. With clear bins for recycling, composting, and the rest, we make smart choices and help recycling and composting work better.
But sorting waste isn't always easy, especially for kids and people with cognitive challenges. All the different stuff and rules can get confusing. It's tough for them to figure out what goes where making them feel left out when it's about helping the environment.
Imagine a campus where everyone—kids, and people with cognitive disabilities—has the power to make things better. Our smart device using cameras and AI changes how we handle waste. It's about making things easier and fairer for everyone on campus. By seamlessly classifying waste through the lens of our advanced AI, students are guided to place their waste in the right bin, effortlessly participating in the global movement towards sustainable practices.
While advancing waste sorting facilities is crucial, instilling sustainable waste sorting habits in children holds immense potential for energy conservation, benefiting both current and future systems. By educating children in sustainable waste management, we not only address immediate needs but also pave the way for a future where efficient practices reduce the energy demands of waste systems. It's vital to view teaching kids about sustainability as equally important as investing in advanced waste management infrastructure. Their understanding and adoption of eco-friendly habits can significantly contribute to long-term energy savings in waste sorting processes.
This system doesn't just help young ones and those facing challenges. It brings us together. We all learn to care for the environment and work as a team to cut waste. It's not just about the bins; it's about building a campus where everyone feels they belong and can help in the sustainability movement.
More than just sorting trash, this system inspires students. They become leaders in making our world cleaner and fairer for all. It's about nurturing a generation that values diversity, stands for inclusion, and leads the way to a sustainable, eco-friendly world.
Note: The Raspberry Pi Camera and Pi Power adapter were purchased from Digikey to meet the design rules of world energy challenge 2023.
Hardware
1 . Raspberry Pi 4B
The brain of the system is a Raspberry Pi 4B. It is a versatile and popular single-board computer that offers a range of features suitable for various projects.
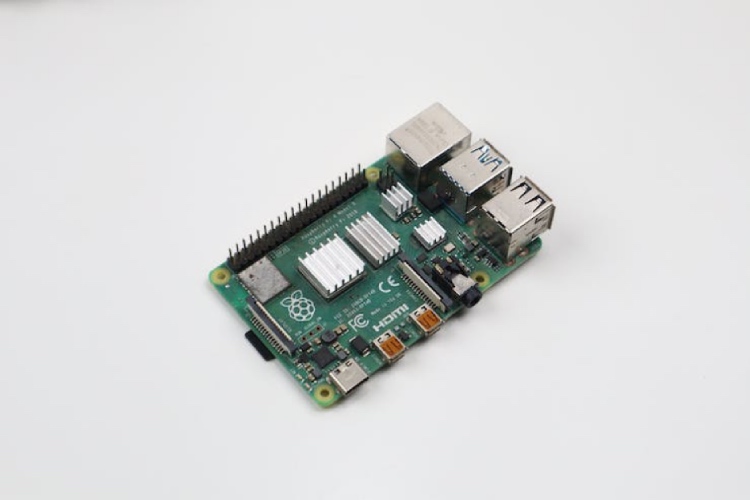
In this project, we leverage the capabilities of Raspberry Pi as a powerful and cost-effective computing platform for recognizing waste objects using the Edge Impulse machine learning framework. The Raspberry Pi serves as the edge device, processing image data from attached cameras and running machine learning models locally without the need for continuous cloud connectivity.
If you don't know how to set up the Pi just go here.
2. Raspberry Pi camera module 3
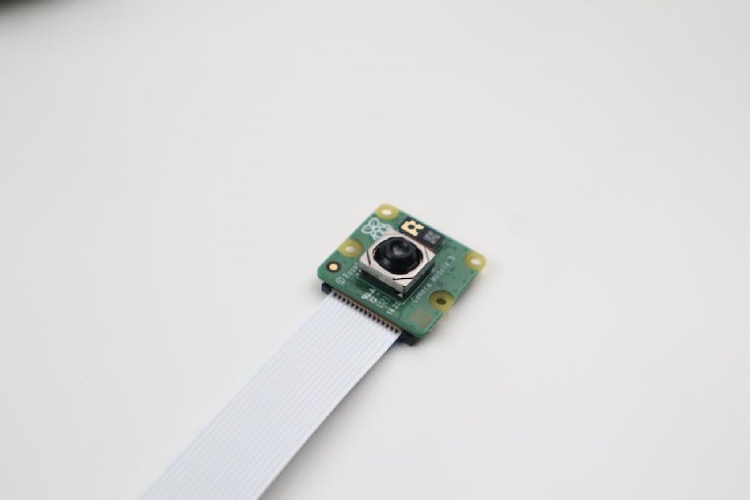
The Camera Module v3, the latest addition to Raspberry Pi's camera lineup, brings a host of advanced features to the forefront, making it an ideal choice for this project. Boasting a 12-megapixel Sony IMX708 image sensor, this module excels in capturing high-resolution stills and video footage. Its improved low-light performance ensures reliable waste object recognition in diverse lighting conditions, while the adjustable focus lens provides flexibility for capturing images at varying distances. With its small form factor, hardware-accelerated H.264 video encoding, and seamless integration with the Raspberry Pi 4B, the Camera Module v3 proves to be a compact yet powerful component of our system. I have used its default cable in this project.
3. Speaker
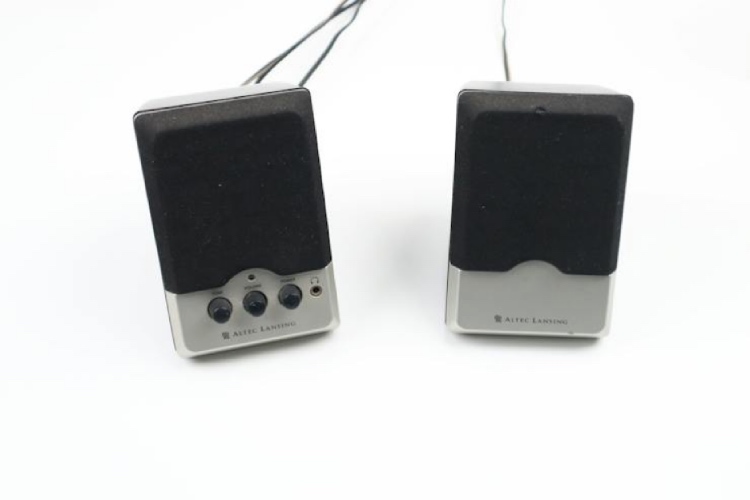
The audio component of our waste object recognition project is facilitated by a standard computer speaker seamlessly connected to the Raspberry Pi. Utilizing a 3.5mm audio jack for easy integration, the speaker ensures amplified and clear audio output for notifications associated with waste object recognition. While requiring an external power supply for operation, its compatibility with the Raspberry Pi and straightforward setup process makes it a versatile and cost-effective solution
4. Power supply
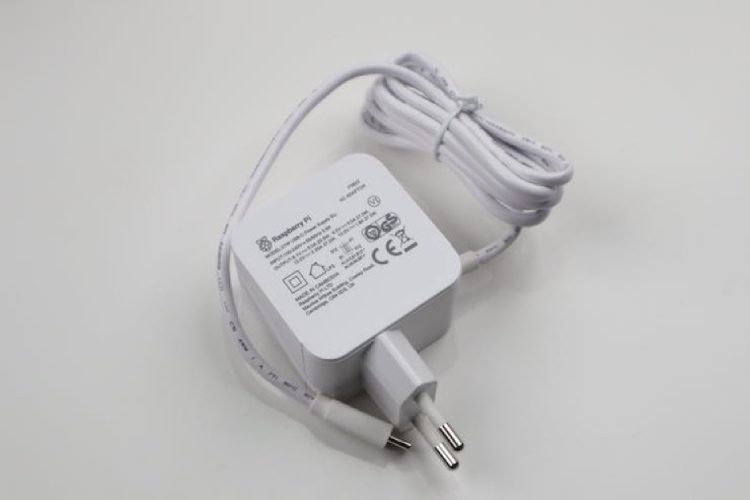
The heart of the project relies on the stability and reliability provided by the official Raspberry Pi Power Supply. Specifically designed and officially endorsed by the Raspberry Pi Foundation, this power supply ensures seamless compatibility with our Raspberry Pi 4B, delivering a consistent power output with the required voltage and current ratings.
5. Assembly

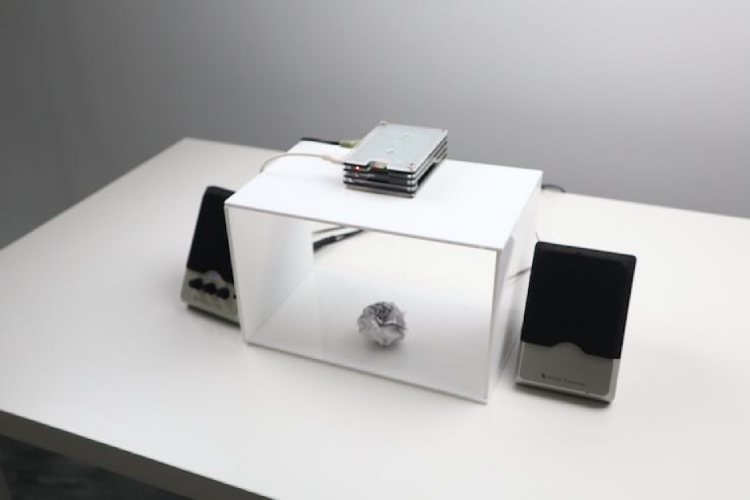
I utilized a laser cutter to precisely cut a 4mm white acrylic sheet into our desired dimensions, which formed the basis of our entire system setup.
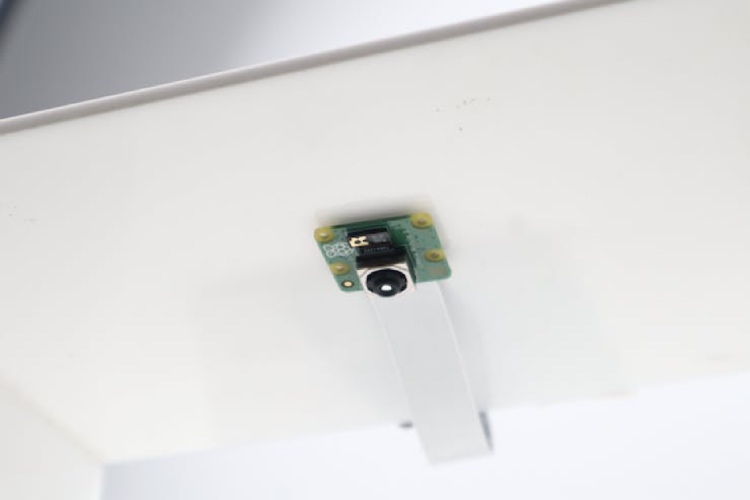
The Camera module is placed under the acrylic sheet using double-sided tapes.
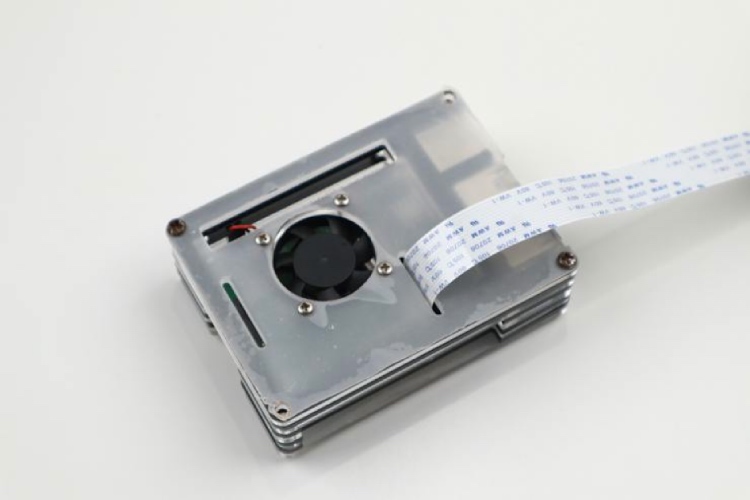
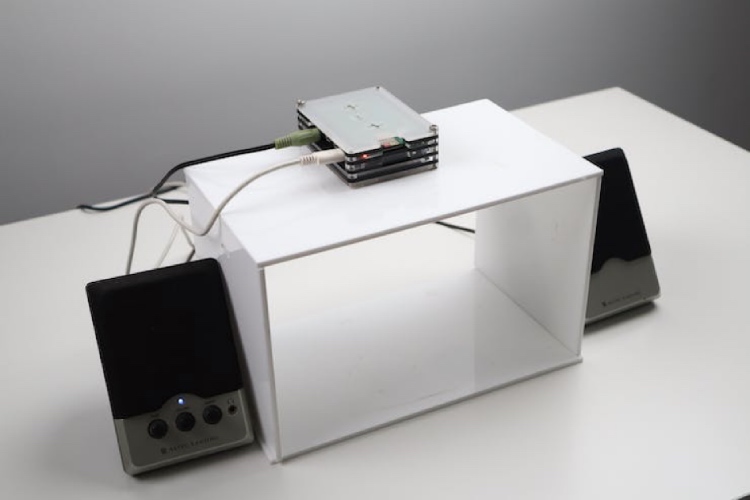
The Raspberry Pi 4B is inserted into this acrylic case and this case was placed on the top of the acrylic box by connecting the speaker and camera module.
Software
Now that all the necessary hardware components are in position, we can proceed to the software aspect. In this segment, we will explore the process of training a TinyML model using Edge Impulse and the subsequent deployment onto our device. Let's start the model building by collecting some data.
Before collecting data make sure to install the Edge Impulse in Raspberry Pi 4 by following this guide.
1. Data Collection
To collect the data run the code named data_collection.py.
python3 data_collection.py
These are waste objects taken in this prototype. The first one is organic waste(orange peels), the second one is plastic and the third one is paper.
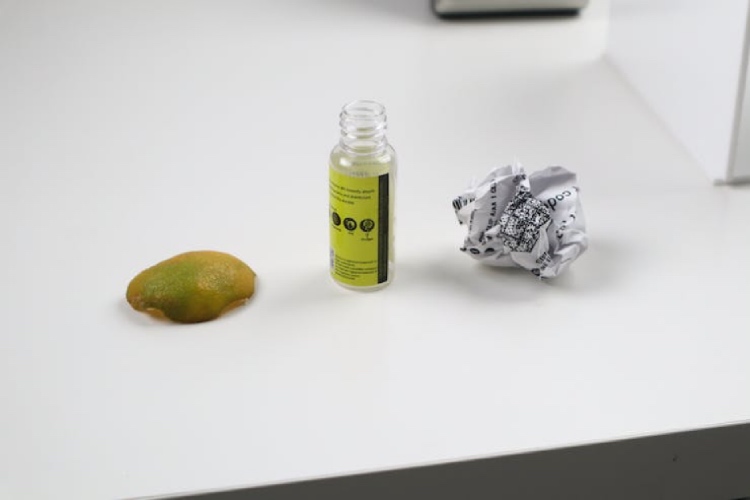
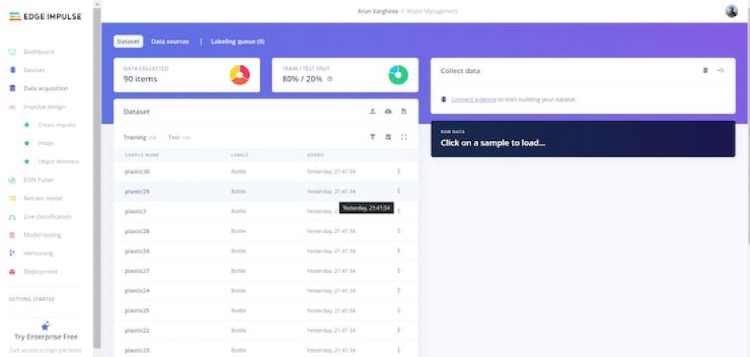
I have collected a total of 90 images of these things and uploaded them to Edge Impulse.
2. Data Labeling
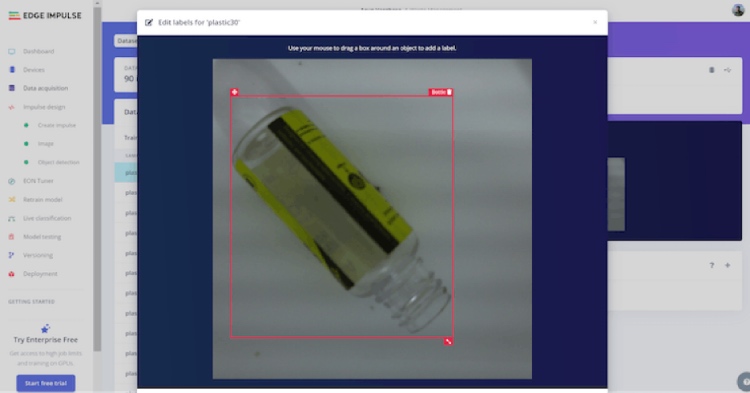
Once the data is uploaded, from the labeling queue we can label the unlabelled images. Here we have three classes and hence three labels - Orange Peel, Bottle, and Paper indicating Organic, Plastic, and Recyclable waste categories respectively.
3. Designing The Impulse
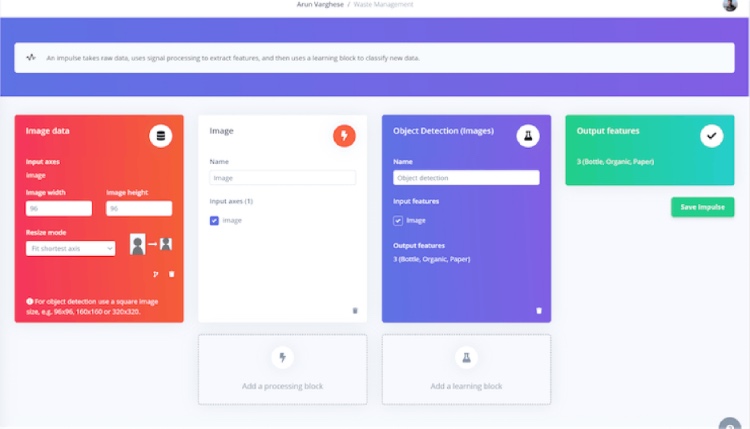
Due to the real-time nature of our case, we need a fast and accurate model. Hence, we have chosen to utilize FOMO, which produces a lightweight and efficient model. To take advantage of FOMO's strengths, we will adjust the image dimensions to 96 pixels. To ensure proper resizing, we will use the Resize Mode to Fit the shortest axis. Moreover, we will incorporate an Image processing block and an Object Detection (Images) learning block into the impulse.
4. Feature Generation
Next, let's navigate to the Image tab and make some important selections. Firstly, we need to choose the appropriate color depth and save the corresponding parameters for feature generation. Considering FOMO's exceptional performance with RGB images, we will opt for the RGB color depth option.
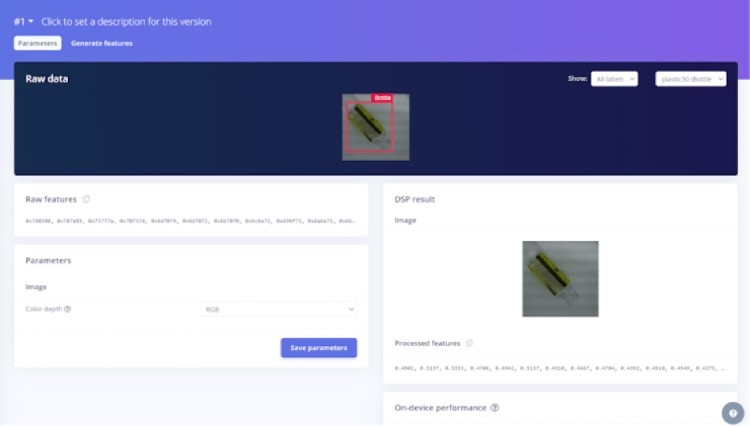
Once we have configured the color depth, we can proceed with generating the desired features. This process will extract relevant characteristics from the images and prepare them for further analysis.
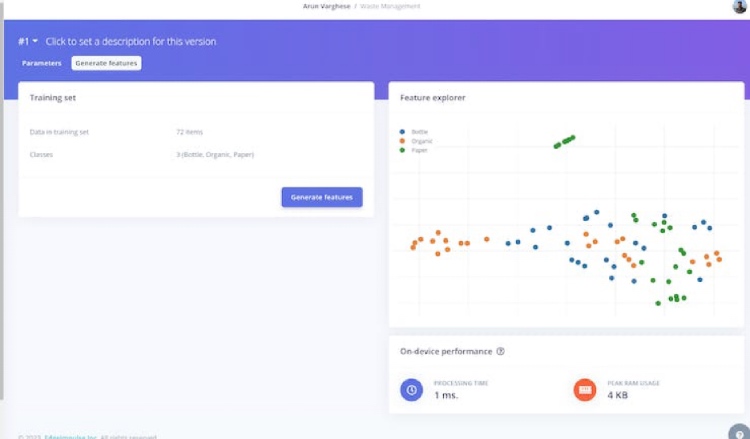
After the feature generation is complete, we can proceed to the next step, which involves training the model. This phase will involve feeding the generated features into the model to optimize its performance and enhance its ability to accurately detect objects.
5. Training the TinyML Model
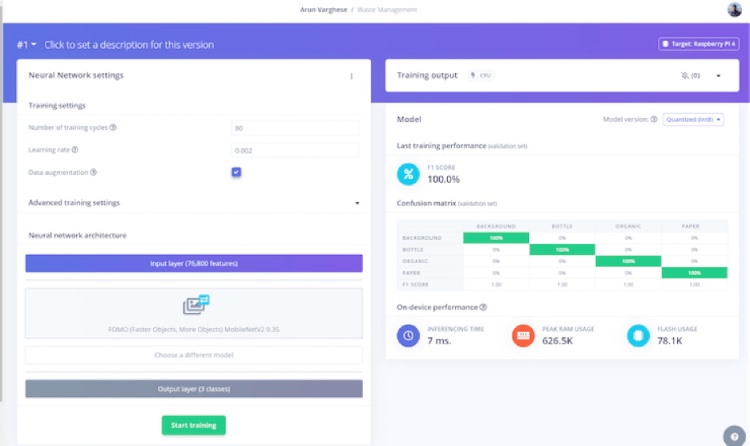
Now that the feature generation is complete, we can move forward with training the model. The training settings we have chosen are shown in the provided image. While you have the flexibility to experiment with different model training settings to achieve a higher level of accuracy, it is important to exercise caution regarding overfitting.
By adjusting the training settings, you can fine-tune the model's performance and ensure it effectively captures the desired patterns and features from the data. However, it is crucial to strike a balance between achieving better accuracy and preventing overfitting. Overfitting occurs when the model becomes too specialized in the training data and fails to generalize well to unseen data.
After an extensive training process using a substantial amount of training data, we have achieved an impressive accuracy of 100% using the above training settings. This high accuracy indicates that the model has effectively learned and generalized patterns from the training data.
6. Testing The Model
To assess the model's performance with the test data, we will proceed to the Model Testing section and select the Classify All option. This step allows us to evaluate how effectively the model can classify instances within the test dataset. By applying the trained model to the test data, we can gain insights into its accuracy and effectiveness in real-world scenarios. The test dataset comprises data that the model has not encountered during training, enabling us to gauge its ability to generalize and make accurate predictions on unseen instances.
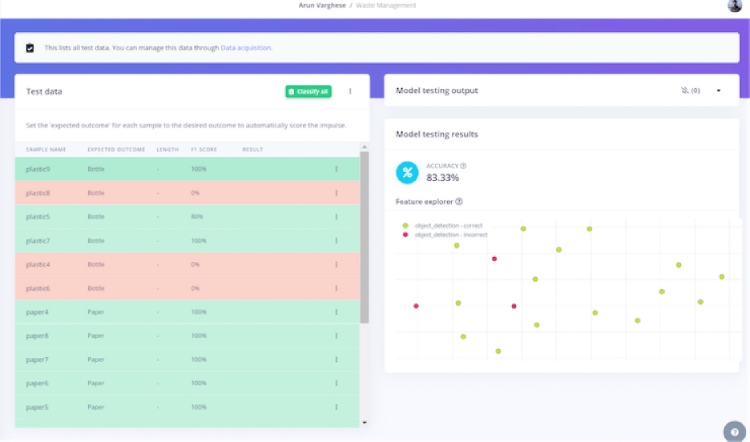
The model exhibits excellent performance with the test data, demonstrating consistent accuracy and effectiveness. Its ability to generalize and make accurate predictions in real-world scenarios is highly commendable. Now let's proceed to deployment.
6. Deploying Model In Raspberry Pi 4
At this point, we have a well-performing tinyML model, and we are ready to deploy it.
To download the model run the below command.
edge-impulse-linux-runner --download modelfile.eim
To make the system work run main.py
python3 main.py <path-to-modelfile>
Code
I've set up a Github repository placing the most up-to-date version of my code. Feel free to explore and experiment with it. Should you face any hurdles while building, don't hesitate to share your questions or problems in the comments section.
Complete Project Code
#!/usr/bin/env python3
import cv2

from picamera2 import Picamera2

import os

import sys, getopt, time

import numpy as np

from edge_impulse_linux.image import ImageImpulseRunner
runner = None
def help():

    print('python3 main.py <path_to_model.eim>')


def main(argv):

    try:

        opts, args = getopt.getopt(argv, "h", ["--help"])

    except getopt.GetoptError:

        help()

        sys.exit(2)
    for opt, arg in opts:

        if opt in ('-h', '--help'):

            help()

            sys.exit()
    if len(args) != 1:

        help()

        sys.exit(2)
    model = args[0]
    dir_path = os.path.dirname(os.path.realpath(__file__))

    modelfile = os.path.join(dir_path, model)
    print('MODEL: ' + modelfile)


    picam2 = Picamera2()

    picam2.configure(picam2.create_preview_configuration(main={"format": 'XRGB8888', "size": (4092,4092)}))

    picam2.start()
    with ImageImpulseRunner(modelfile) as runner:

        try:

            model_info = runner.init()

            print('Loaded runner for "' + model_info['project']['owner'] + ' / ' + model_info['project']['name'] + '"')

            labels = model_info['model_parameters']['labels']


            while True:

                img = picam2.capture_array()

                if img is None:

                    print('Failed to capture image')

                    exit(1)

                #cv2.imshow('image',img)

                # imread returns images in BGR format, so we need to convert to RGB

                img = cv2.cvtColor(img, cv2.COLOR_BGR2RGB)
                # get_features_from_image also takes a crop direction arguments in case you don't have square images

                features, cropped = runner.get_features_from_image(img)
                res = runner.classify(features)
                if "classification" in res["result"].keys():

                    print('Result (%d ms.) ' % (res['timing']['dsp'] + res['timing']['classification']), end='')

                    for label in labels:

                        score = res['result']['classification'][label]

                        print('%s: %.2f\t' % (label, score), end='')

                    print('', flush=True)
                elif "bounding_boxes" in res["result"].keys():

                    print('Found %d bounding boxes (%d ms.)' % (len(res["result"]["bounding_boxes"]), res['timing']['dsp'] + res['timing']['classification']))

                    for bb in res["result"]["bounding_boxes"]:

                        print('\t%s (%.2f): x=%d y=%d w=%d h=%d' % (bb['label'], bb['value'], bb['x'], bb['y'], bb['width'], bb['height']))

                        cropped = cv2.rectangle(cropped, (bb['x'], bb['y']), (bb['x'] + bb['width'], bb['y'] + bb['height']), (255, 0, 0), 1)

                        if bb['value'] > 0.8:

                            print(bb['label'])

                            os.system(f"ffplay -v 0 -nodisp -autoexit {bb['label']}.mp3")
                # the image will be resized and cropped and displayed

                cv2.imshow('image', cv2.cvtColor(cropped, cv2.COLOR_RGB2BGR))

                cv2.waitKey(1)
        finally:

            if (runner):

                runner.stop()
if __name__ == "__main__":

   main(sys.argv[1:])
